Configuring a Proxmox-Based Hacking Lab: Active Directory and Windows Setup
14 min read
September 8, 2023


Kicking Off: Advancing Your Hacking Lab with Proxmox and Active Directory
Welcome back! After a brief summer hiatus, I’m excited to dive back into our series on crafting a hacking lab with Proxmox. This chapter marks a significant leap forward as we delve into the final touches on Windows machine driver configurations and embark on setting up a fully operational Active Directory environment. This setup is not just about technical configuration; it’s a playground for honing your skills in a variety of attacks seen in the Active Directory series.
In this installment, we’ll tackle the intricacies of Active Directory configurations, from driver installations to domain controller setups. We’ll walk through each step methodically, ensuring you have a solid understanding of the process and its importance in a simulated attack environment. This guide is designed to be your roadmap for creating a realistic and functional Active Directory domain within Proxmox, where you can safely practice and master numerous attack strategies.
Whether you’re refining your skills or just starting, this chapter is crafted to enhance your understanding and execution of complex network setups. So, with the previous article as our foundation, let’s embark on this journey to build a robust and versatile hacking lab. Let’s get started!
Configuring Drivers on Your Domain Controller: A Step-by-Step Guide
Our journey continues from where we left off in the first article. Upon logging into our domain controller, we’re greeted with the familiar Server Manager interface. If you’ve reached this stage without a hitch, it’s time to get those drivers up and running.
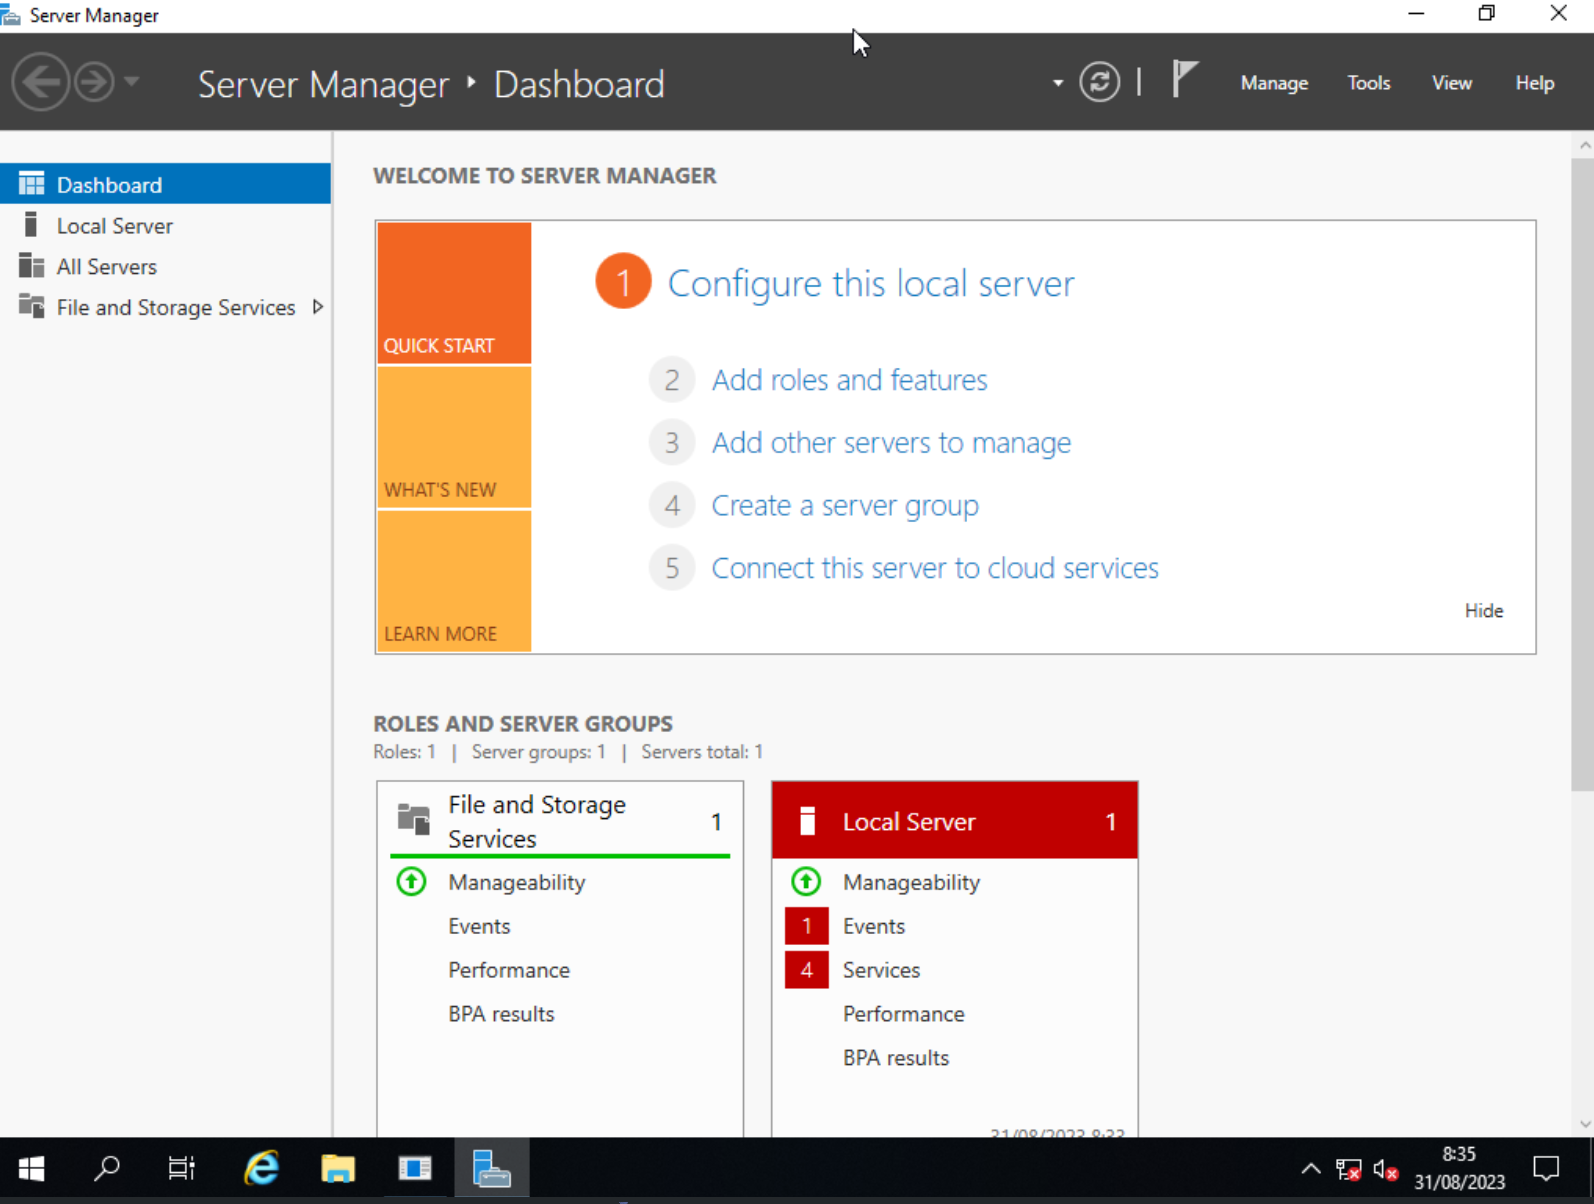
Server Manager interface
Let’s navigate to “This PC,” where we’ll delve into its properties and access the device manager. Here, you’ll likely spot three devices flagged with issues. Fear not - let’s tackle them one by one.
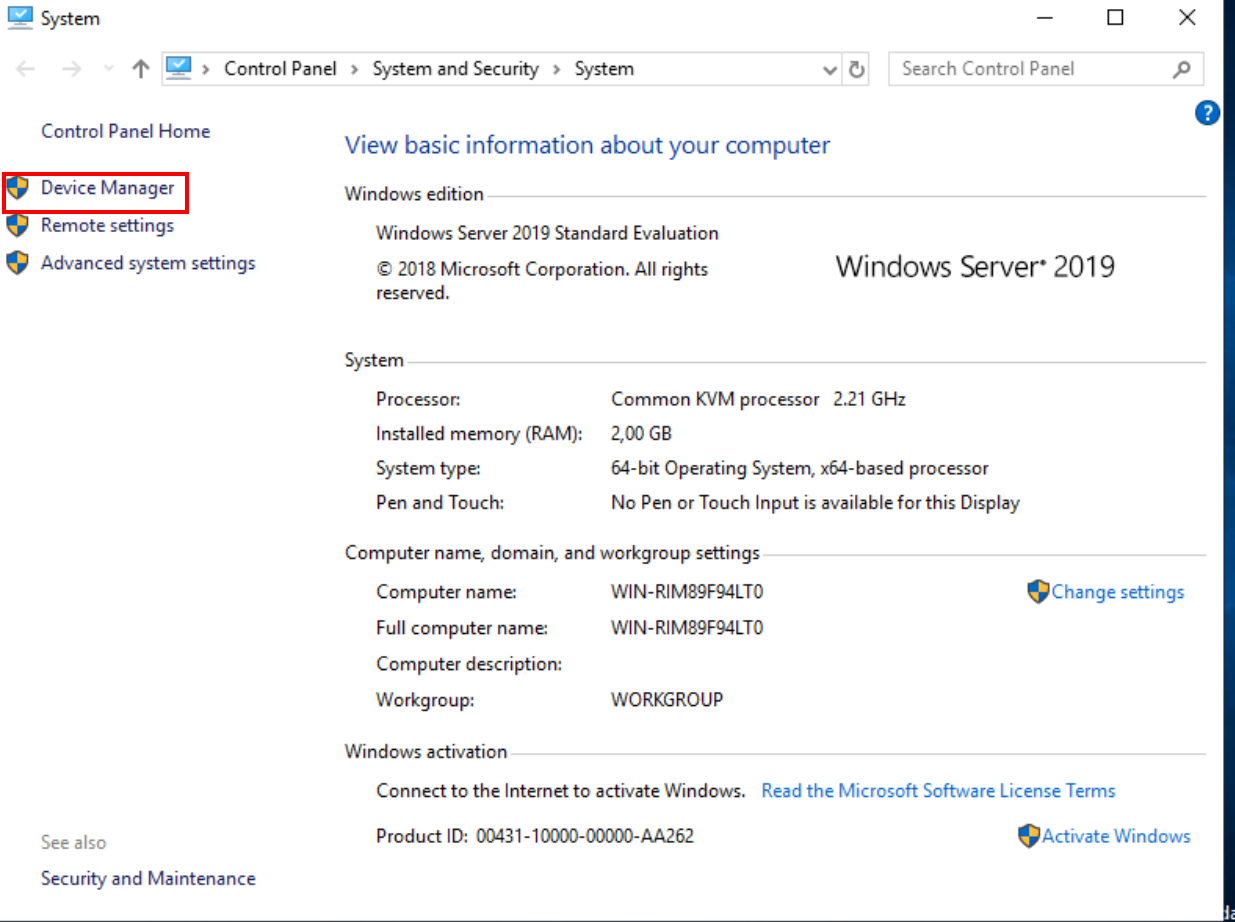
Select “Device Manager”.
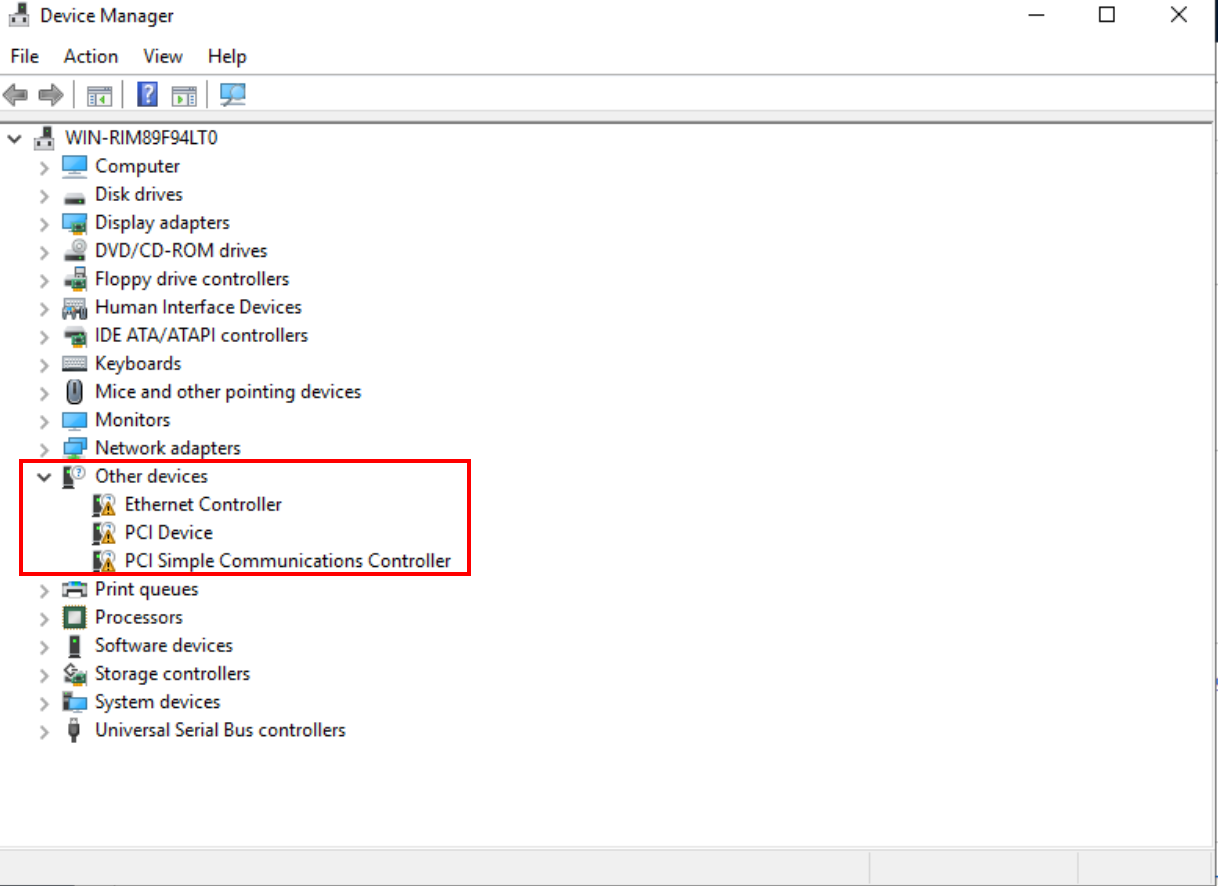
Displays of the three devices giving errors
Updating the First Device
Right-click on the first device with an error.Choose ‘Update driver,’ then ‘Browse my computer for driver software,’ and finally hit ‘Browse.‘Hunt down the version of your operating system and select the ‘amd64’ folder. This should get the internet connection driver up and running smoothly.
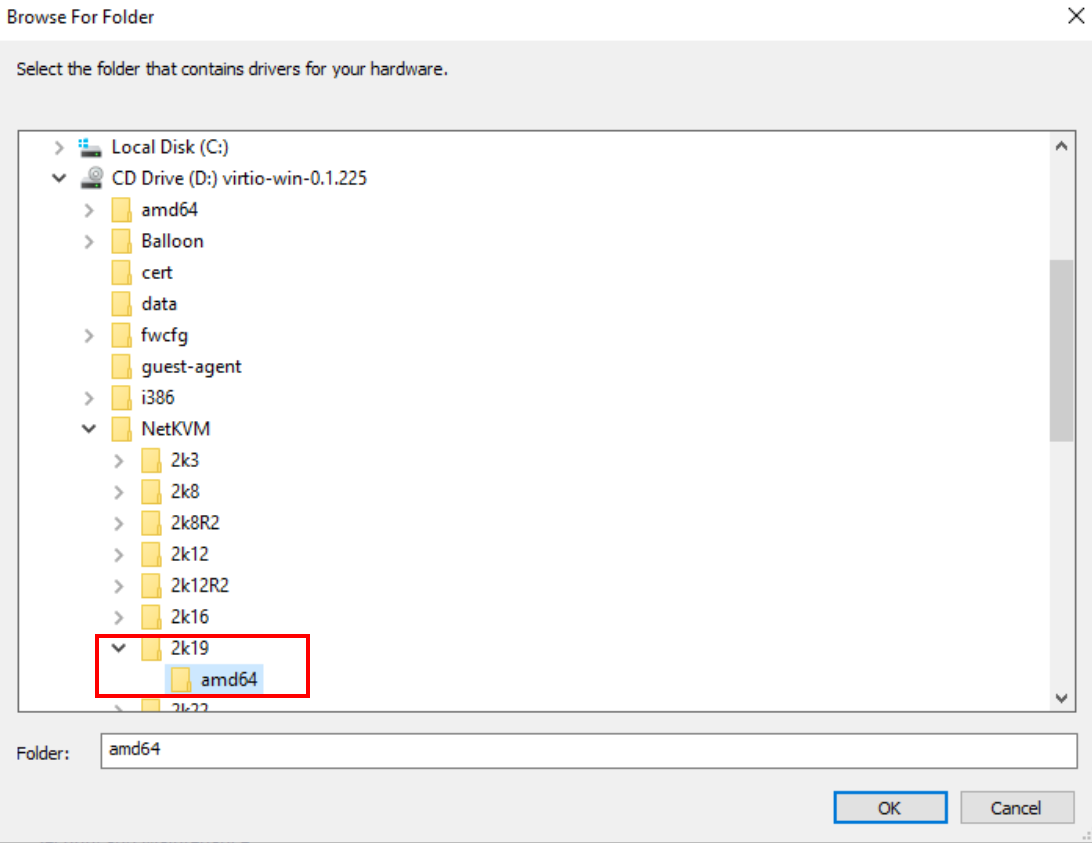
Selection of driver for internet connection
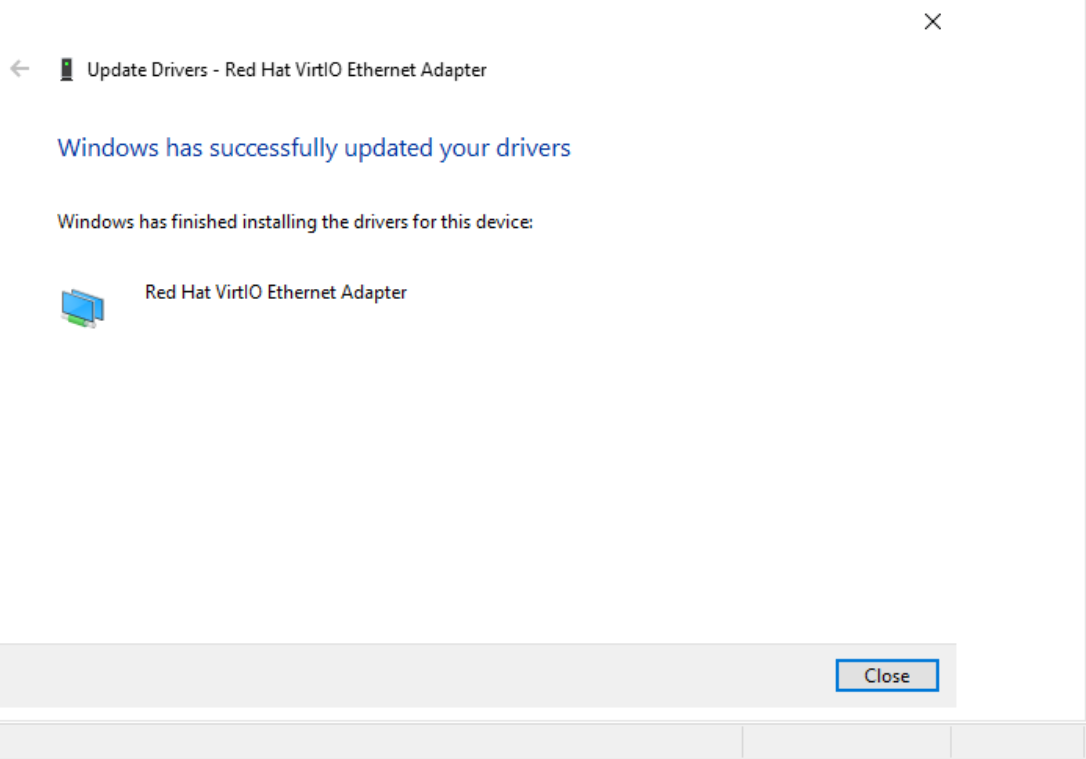
Driver successfully installed
Addressing the Remaining Devices:
The process for the other two devices is similar but with a slight tweak. This time, head straight to the ‘D:’ drive, which houses the necessary drivers.
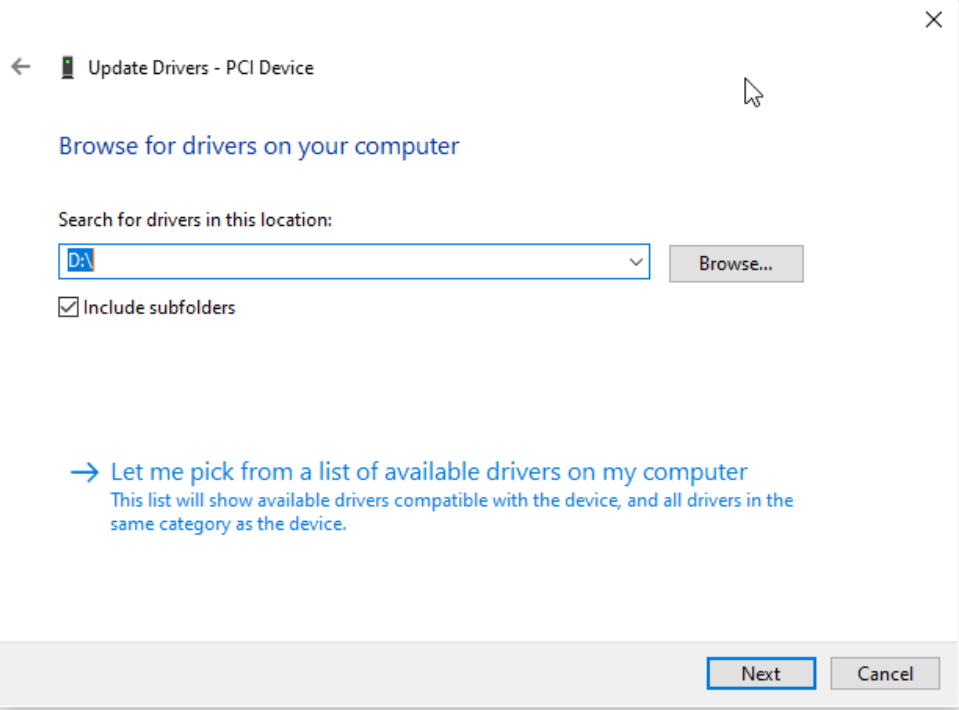
Install the rest of the devices starting from the “D:” drive
With all drivers functioning, our path is clear to proceed with the Active Directory setup. Remember, this driver configuration is a must-do for every Windows machine in your domain.
Active Directory Configuration: Building Your Digital Fortress
Before we dive into the nitty-gritty of Active Directory setup, here’s a quick tip: If you’re locked out and facing the ‘ctrl+alt+delete’ prompt, a simple click on the screen lock unlocking button (as shown below) will set you free.
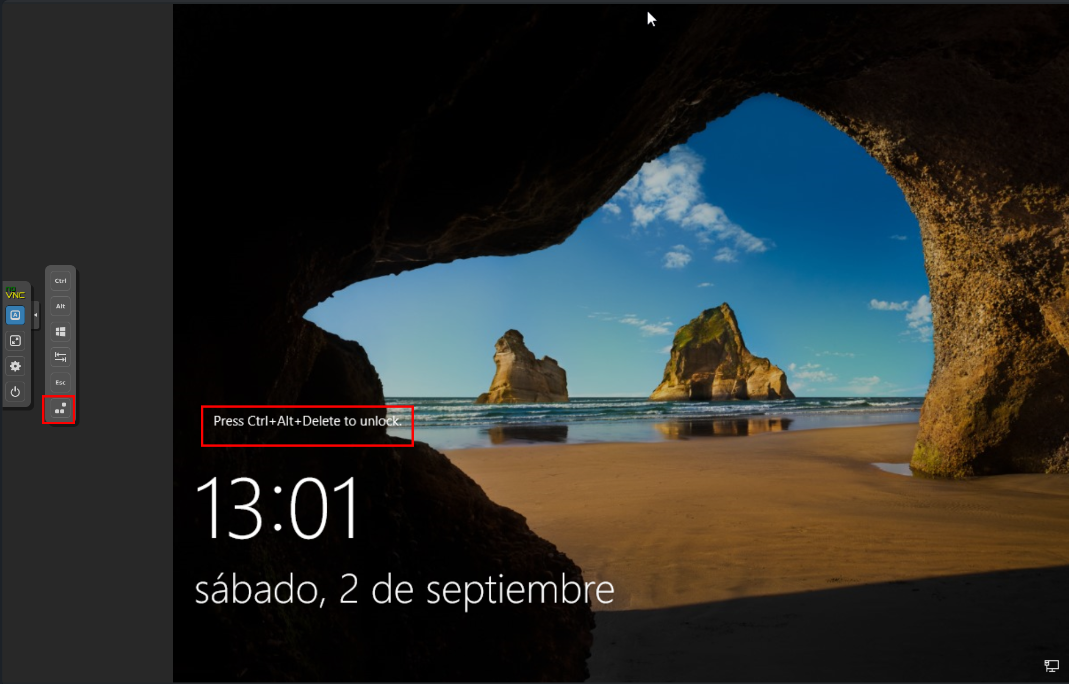
Screen lock unlocking
Domain controller
Start by giving your machine a personalized touch with a new name. Choose a theme close to your heart - be it Marvel, Star Wars, or anything else. Head over to ‘view your PC name’ and select ‘Rename this PC’ to christen your domain controller.
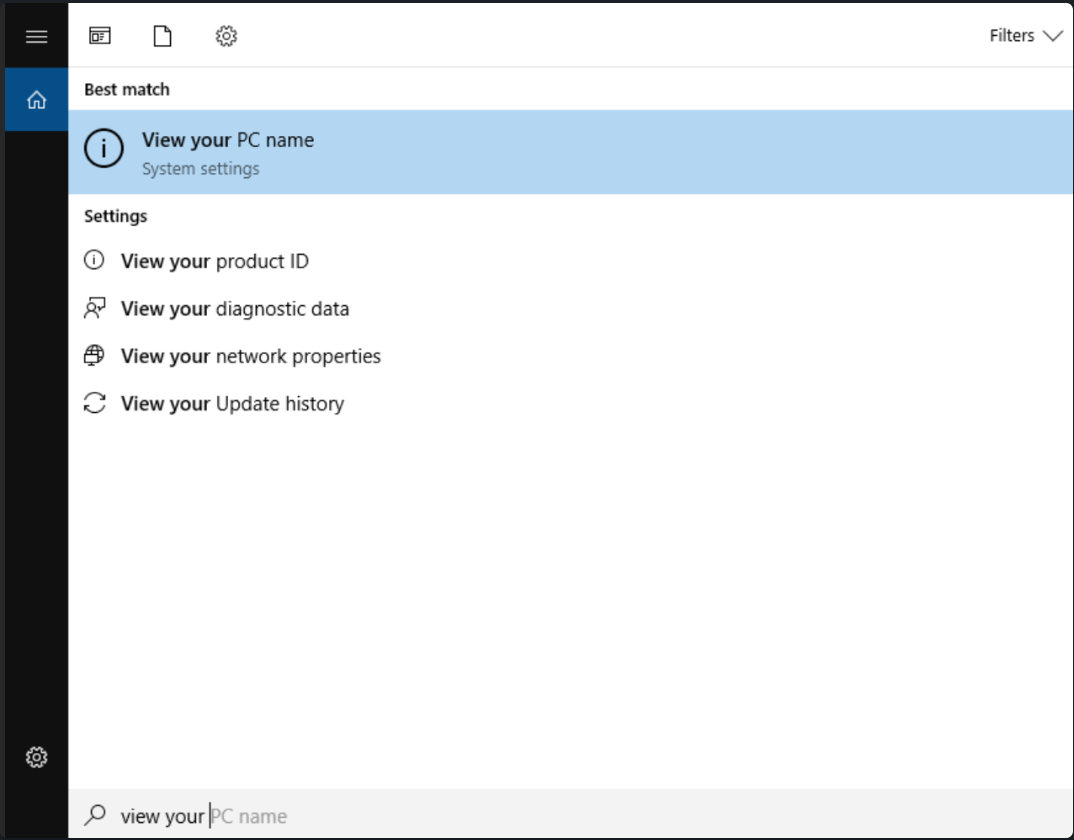
Search for the option to rename the machine
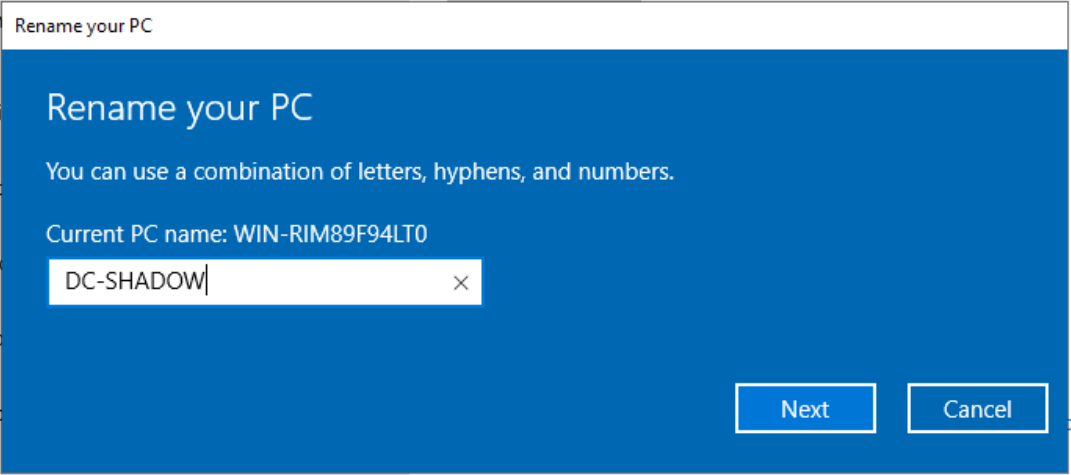
Change machine name
Installation of active directory functionalities
Post-renaming and a quick reboot, reopen ‘Server Manager.’ From here, click ‘Manage,’ followed by ‘Add roles and features.’
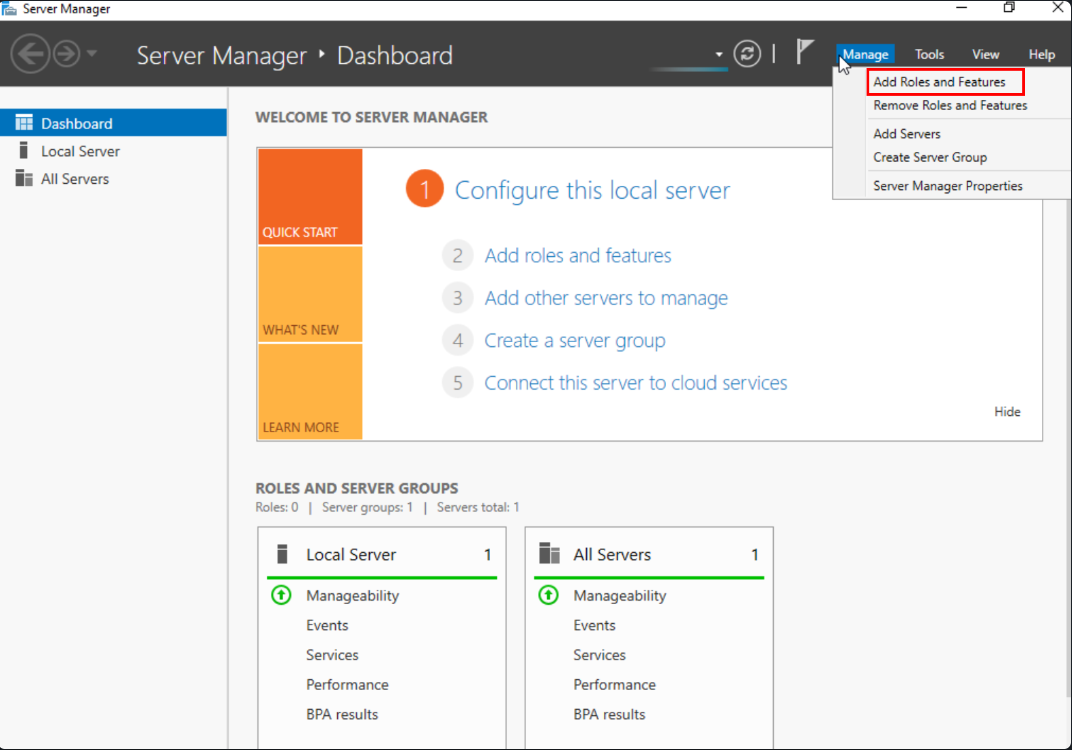
Add roles and Features
Progress through the steps until you reach the ‘Active Directory Domain Services’ selection. Add this feature and march towards the end of the installation.

Active Directory Domain Services
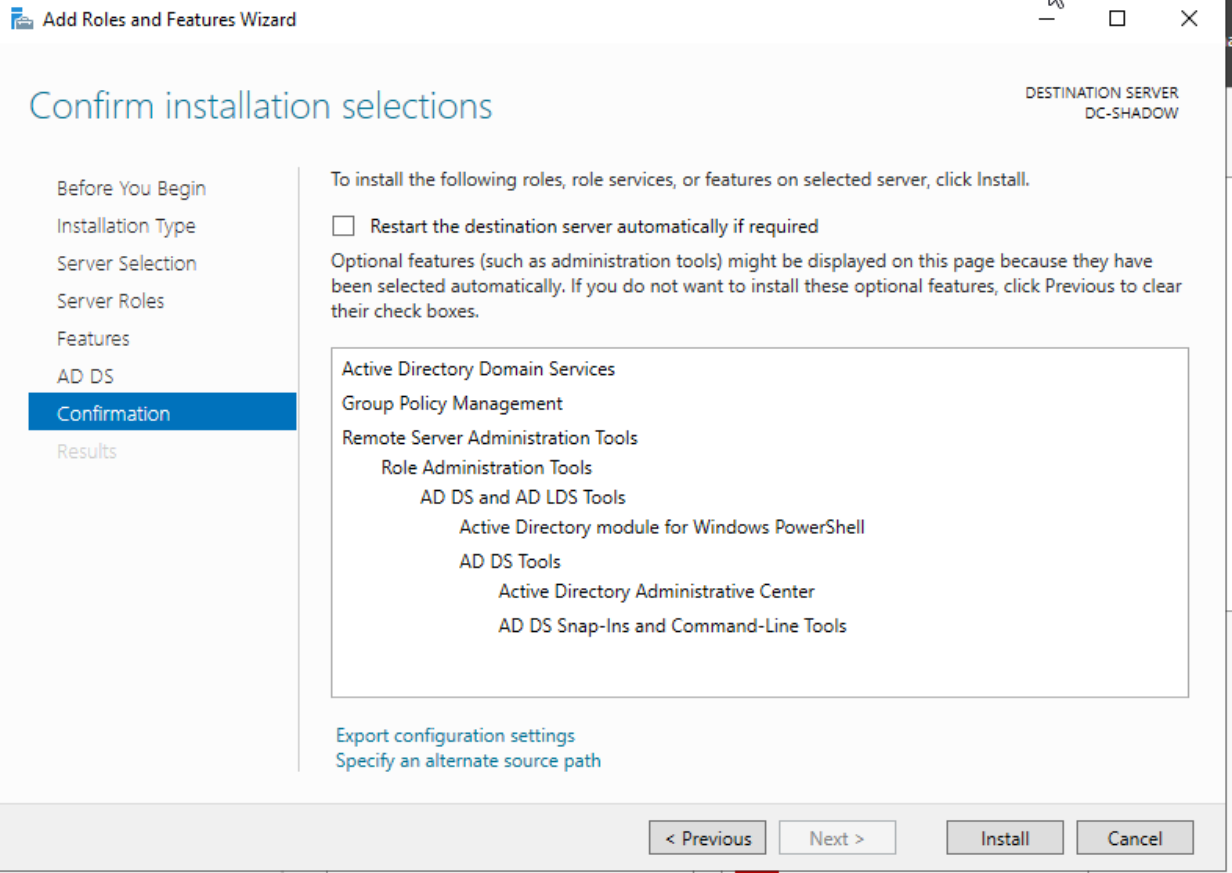
Completion of installation
Elevating to a Domain Controller
Once the installation wraps up, click on ‘Promote this server to a domain controller.’
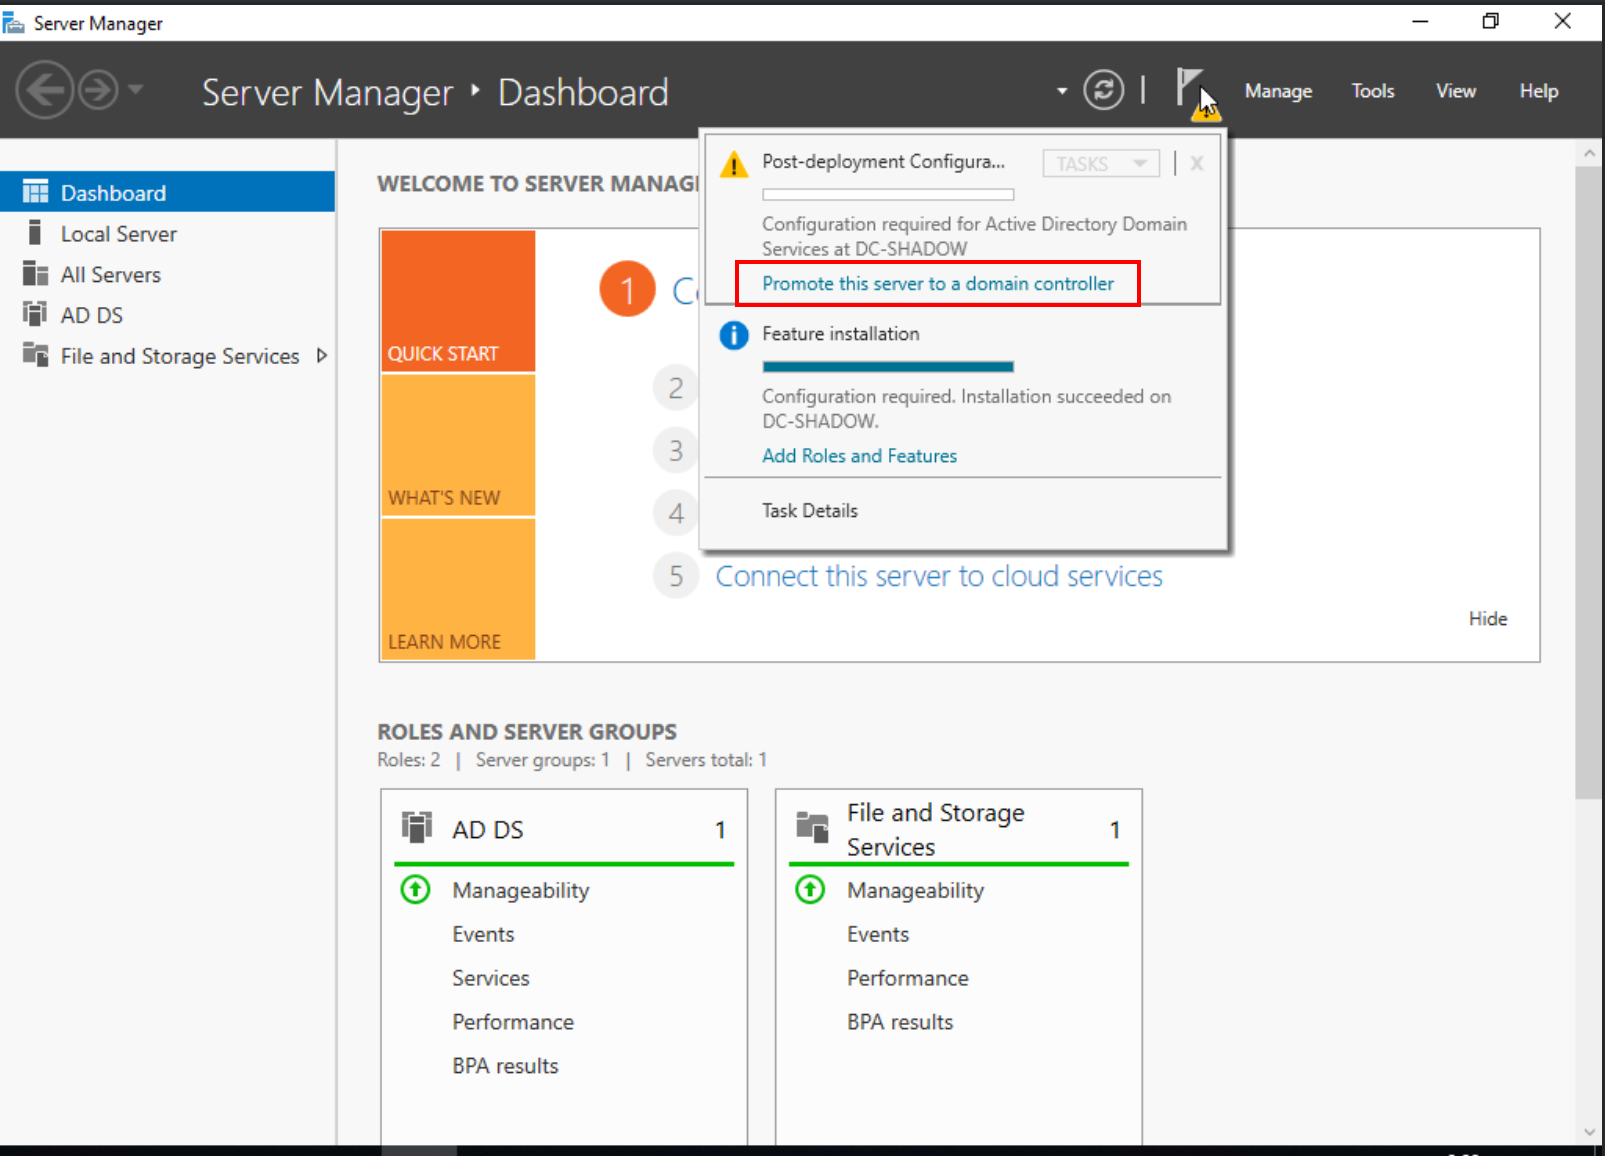
Promote this server to a domain controller
Input your chosen domain name, ensuring it ends with ‘.local.’ Opt for ‘Add new forest’ and proceed to set your administrative password.
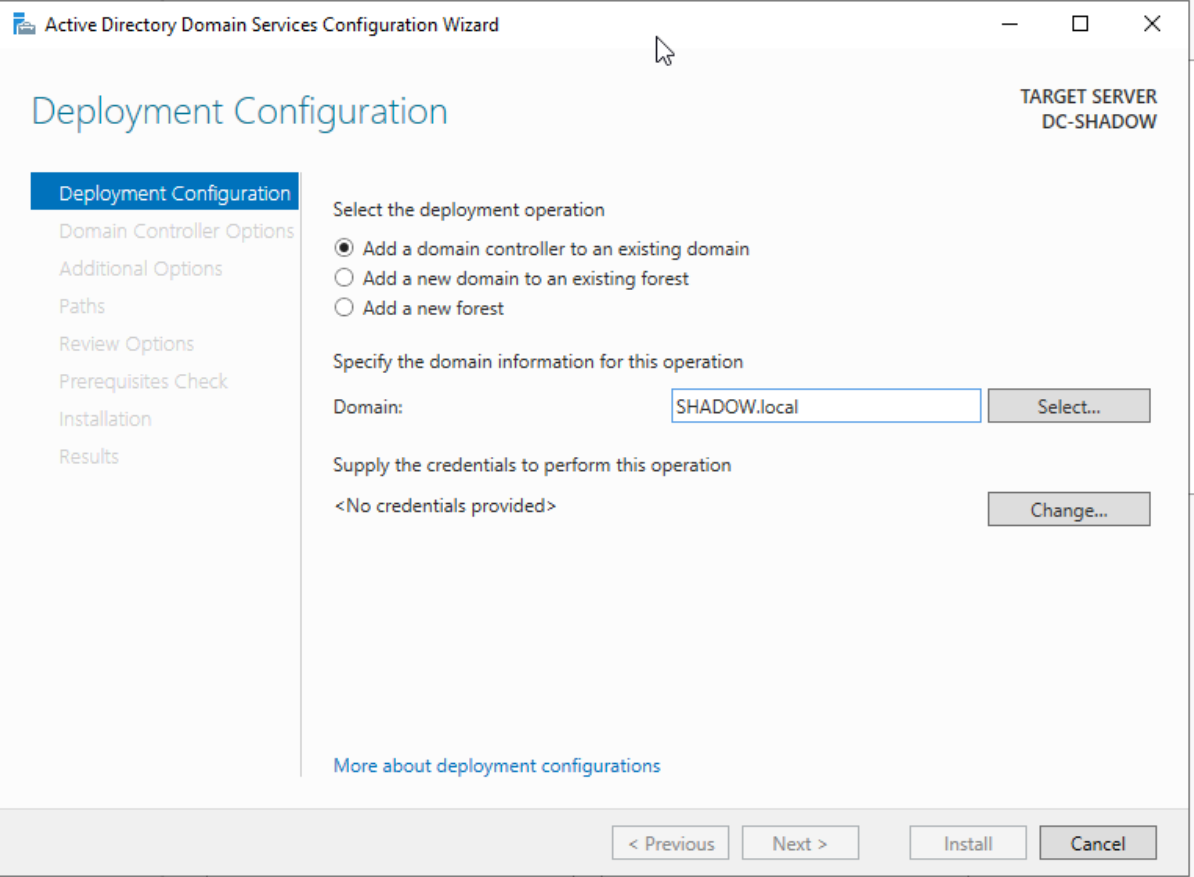
Domain name configuration
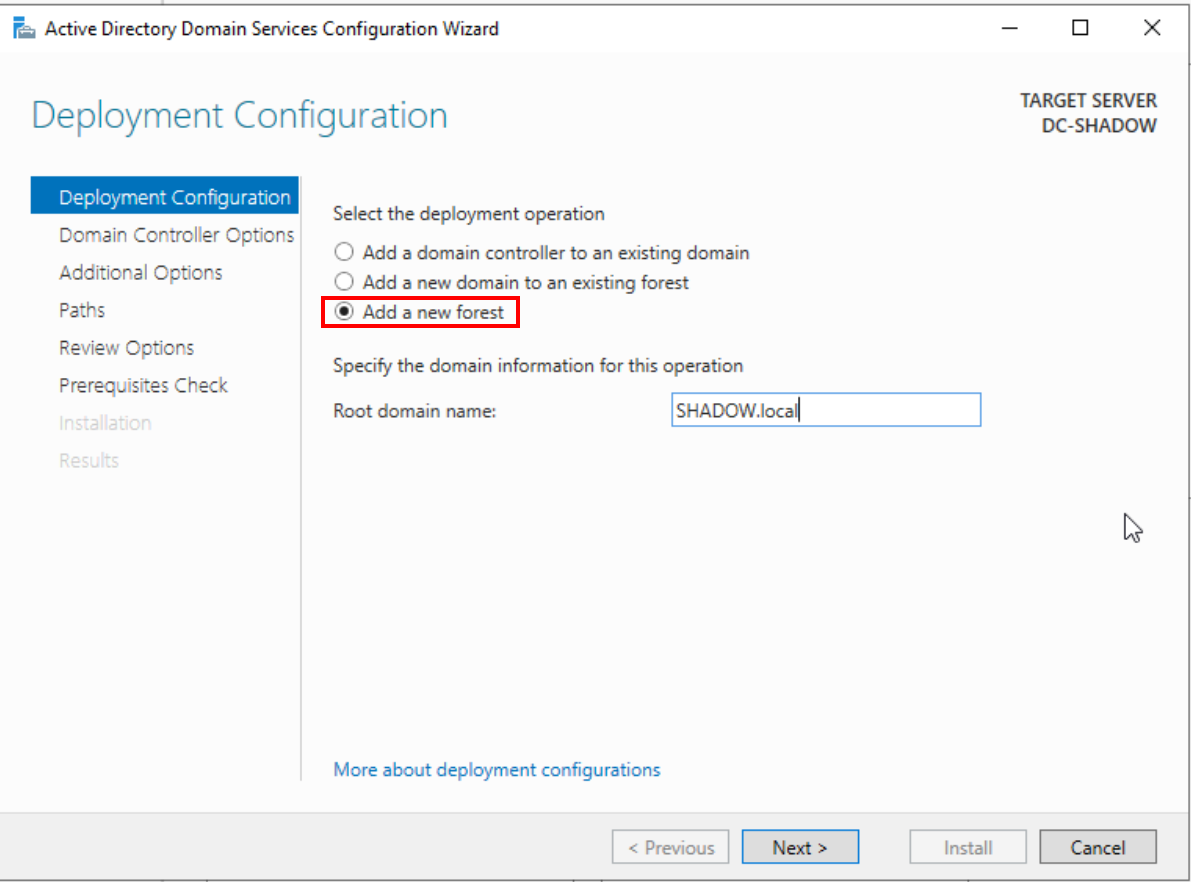
Forest name configuration

Restoration service configuration
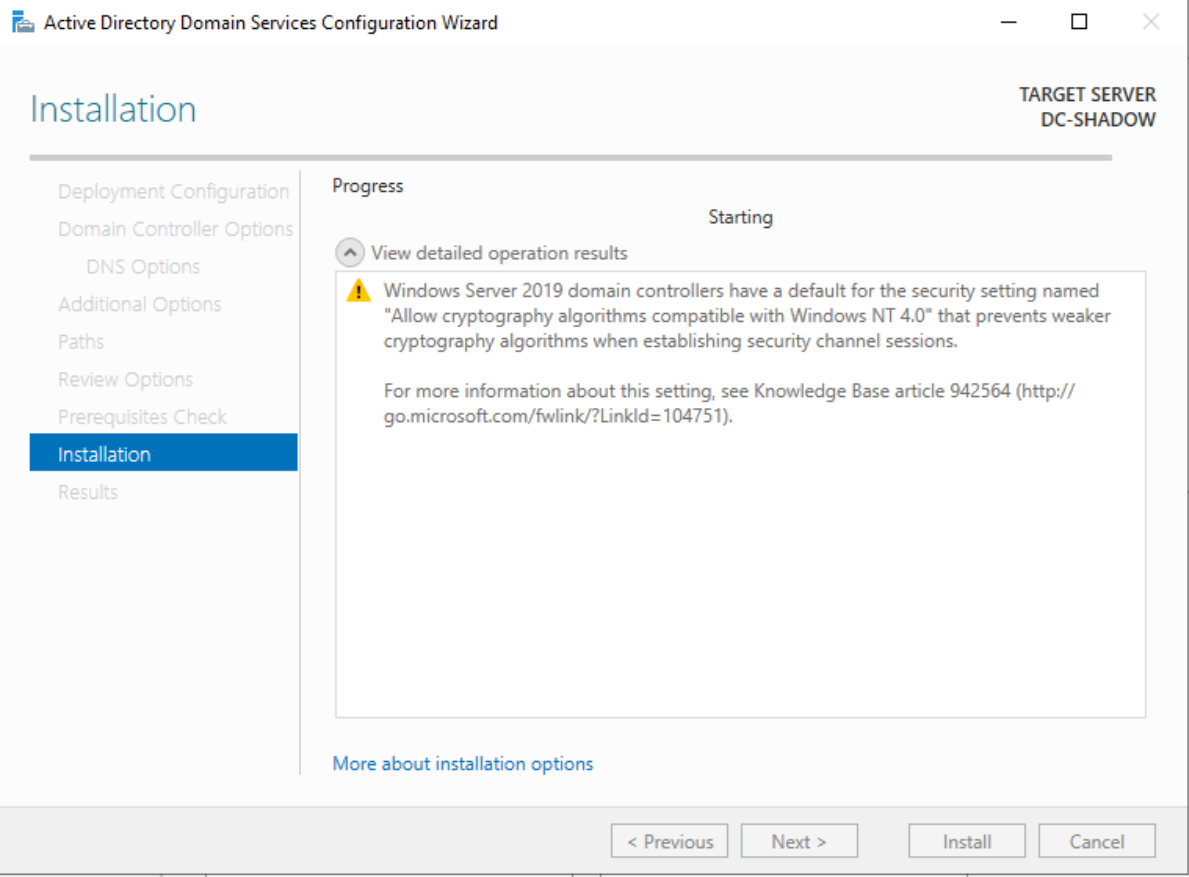
Follow through with the setup steps until you hit the final install prompt. A machine reboot is on the cards post-installation
Completoin of the configuration
Certificate Service
Back in the Server Manager, it’s time to add the certificate service, crucial for launching LDAPs and IPv6 attacks. Repeat the ‘Add roles and features’ steps, but this time, select ‘Active Directory Certificate Services’ and add the required features.
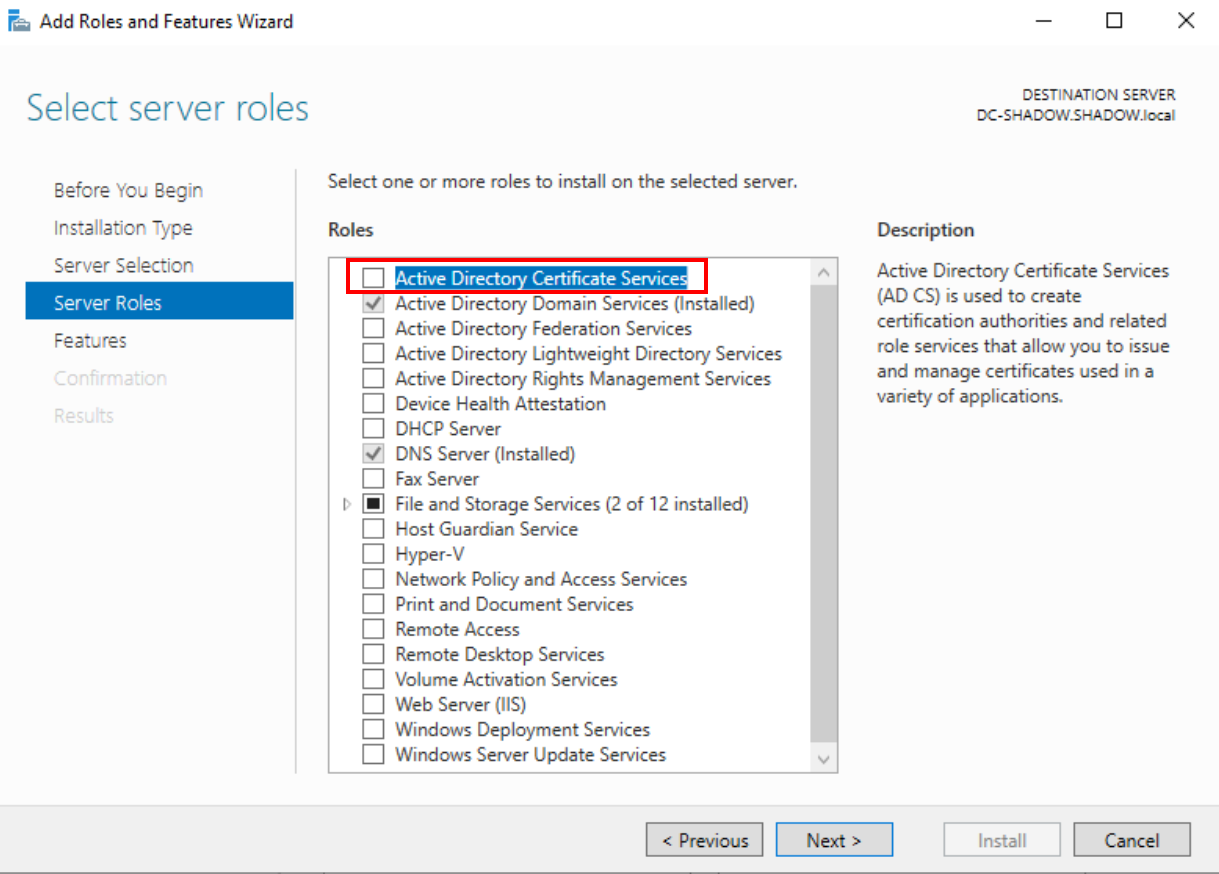
Installation of “Active Directory Certificate Services”
We will continue until we get to the confirmation section where we will check the box indicated in the following image and then proceed with the installation.
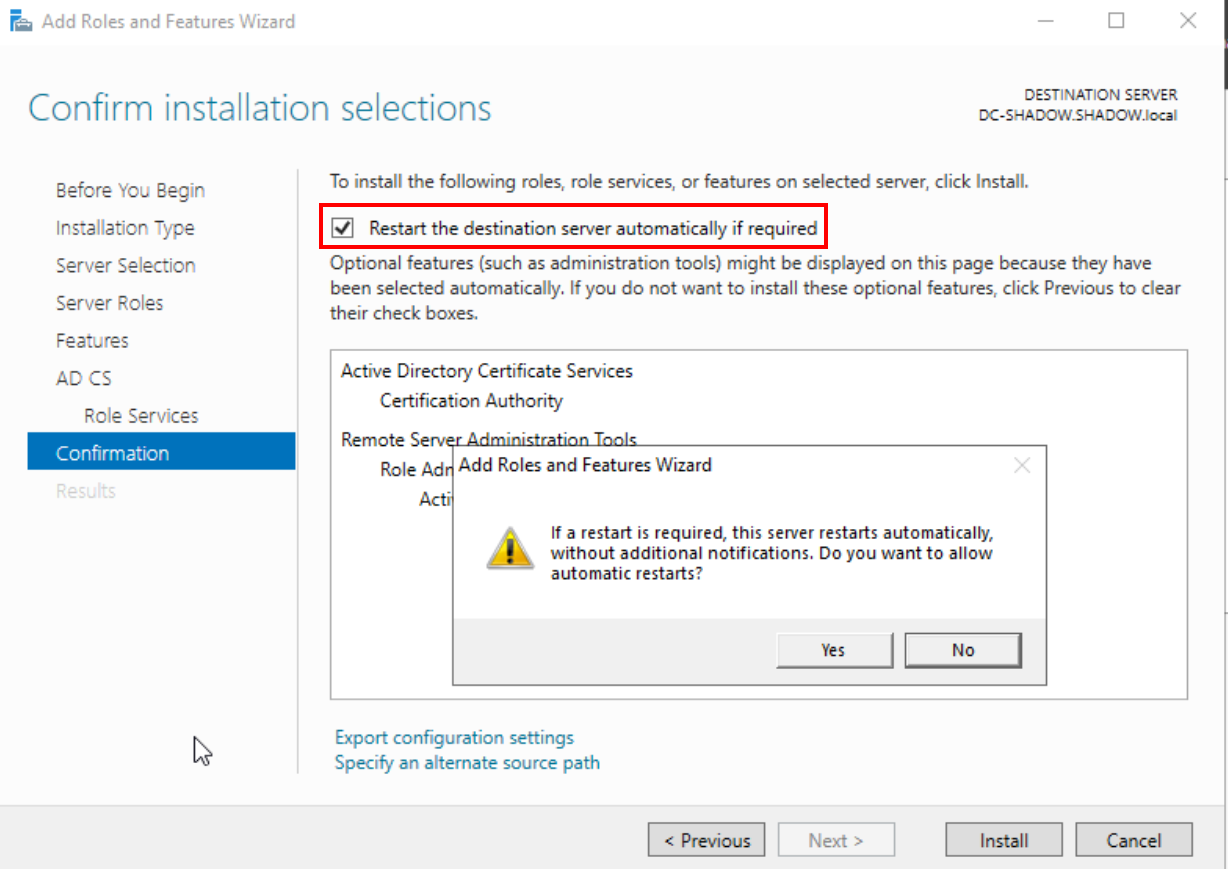
Completion of the installation
Post-installation, configure the certificate service, opting for ‘Certification Authority’ under ‘Role Service.’ Set a generous ‘Validity Period’ of 99 years (who knows how long your lab will be operational!), and finalize the setup with a ‘Configure’ click and a machine restart.
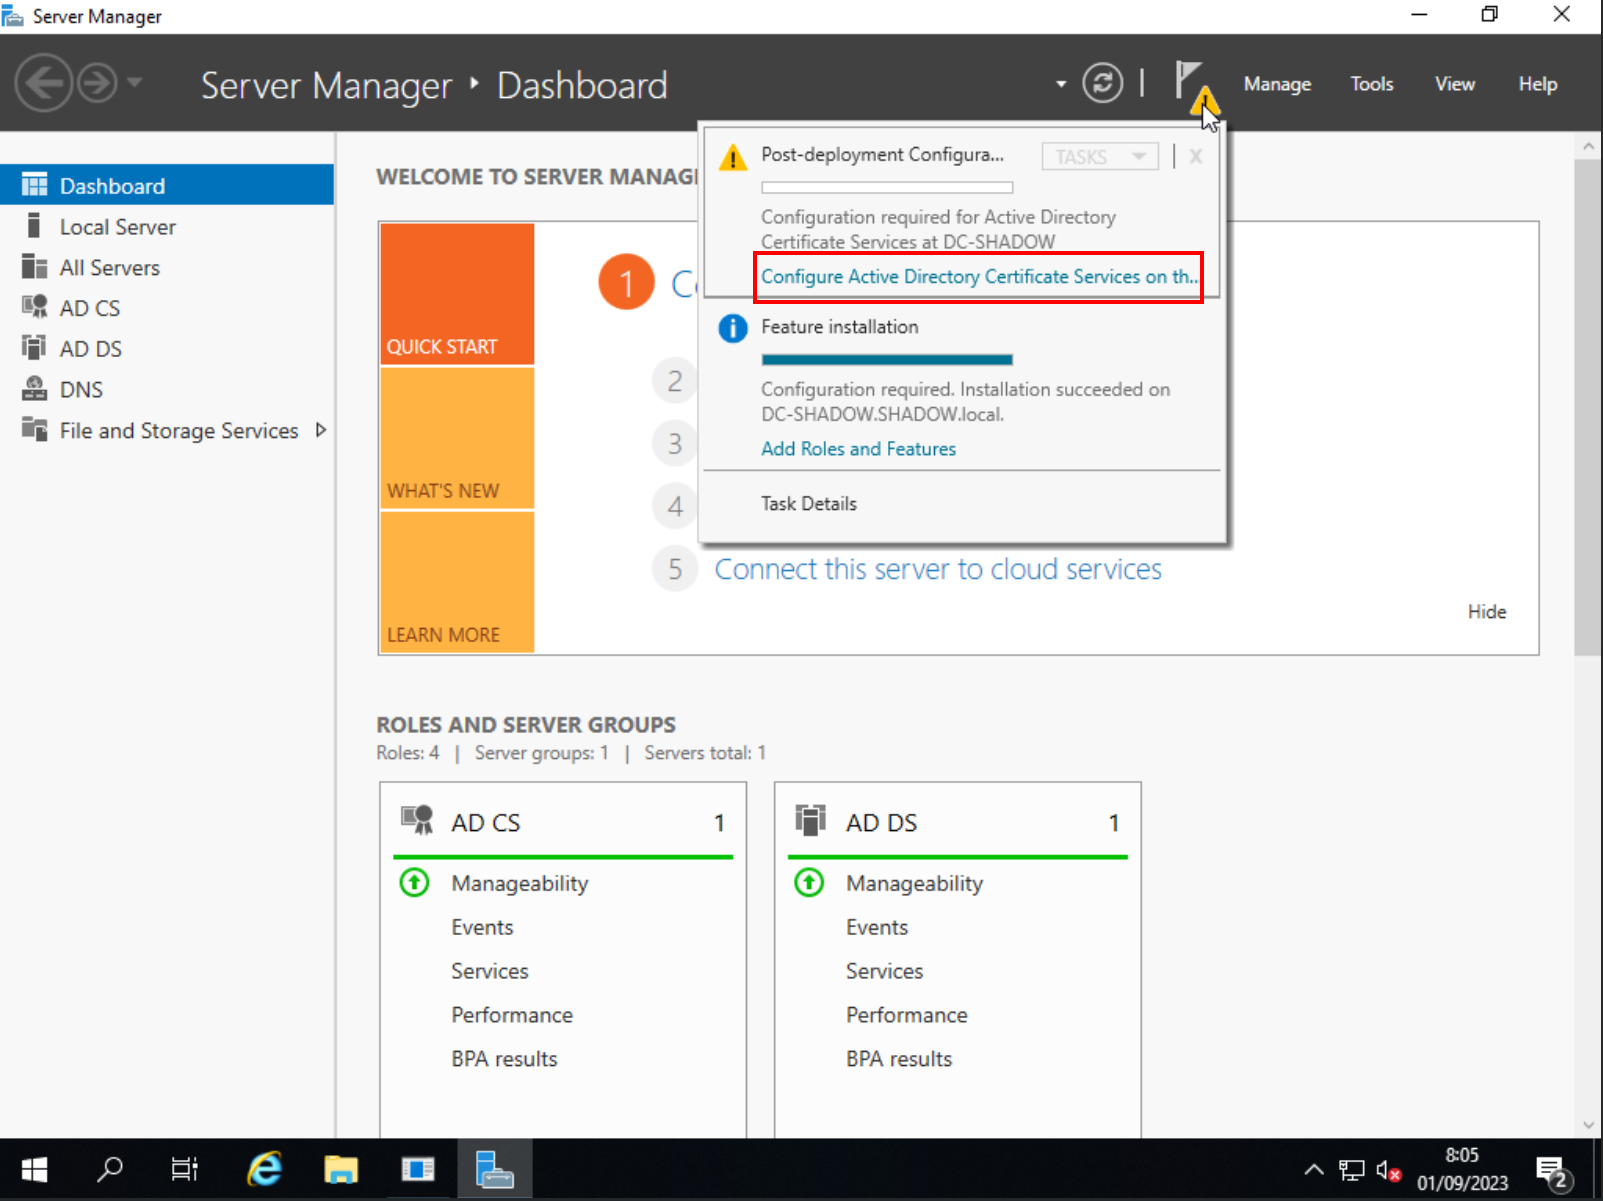
Certificate service configuration
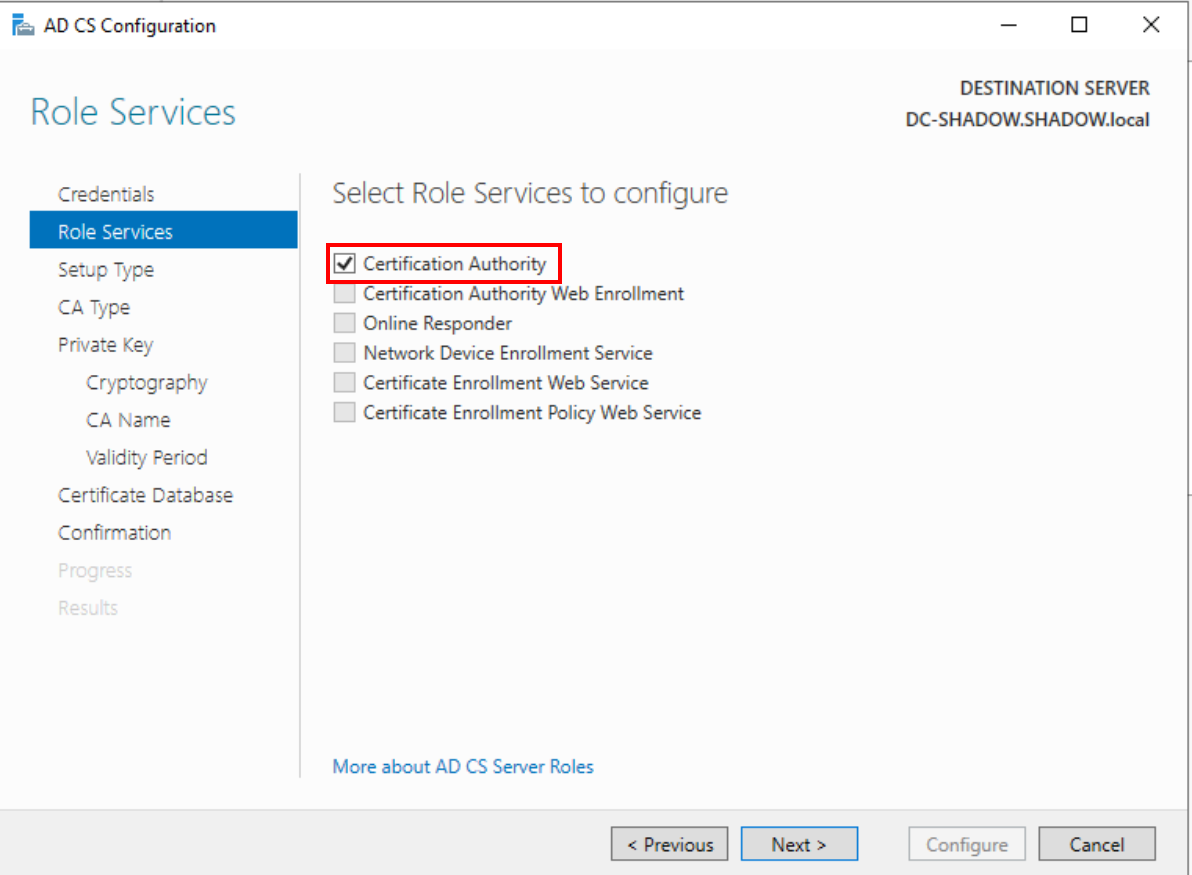
Certification Authority
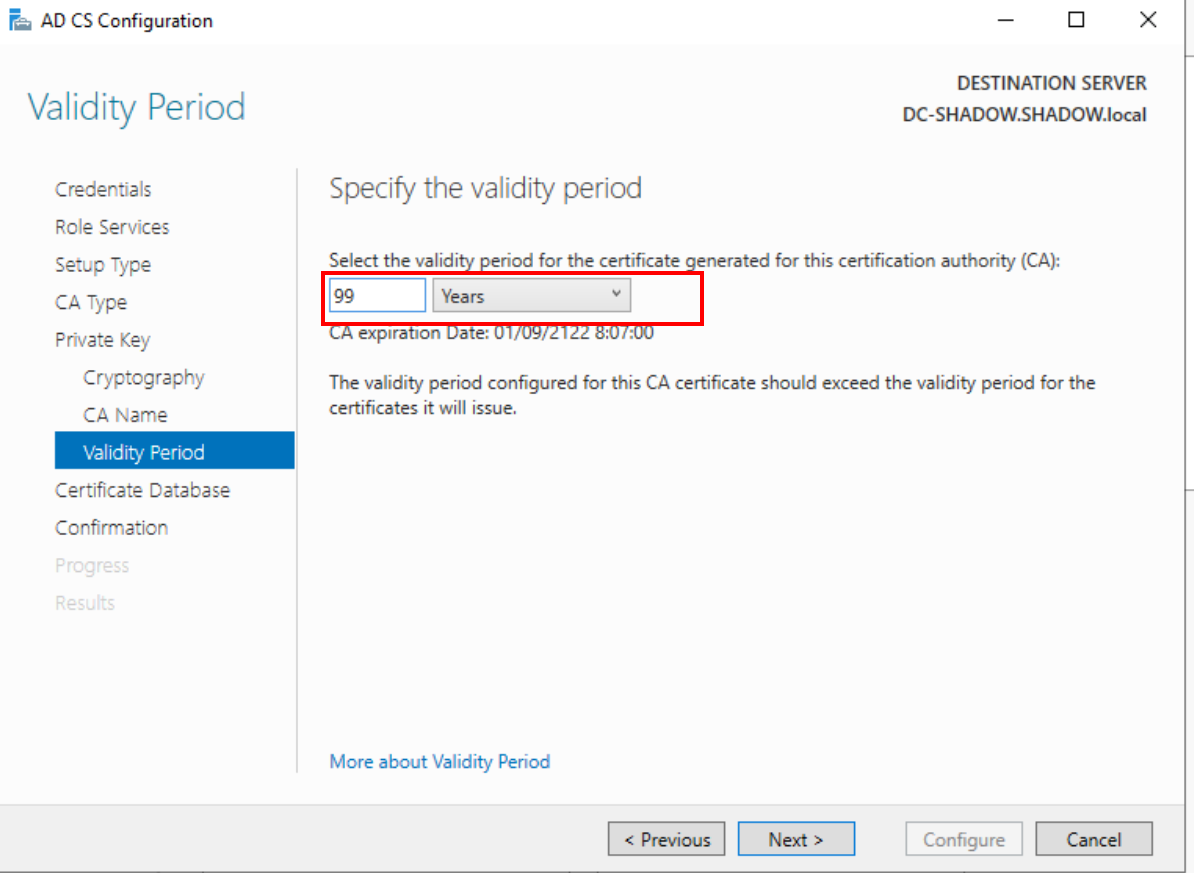
Validity period
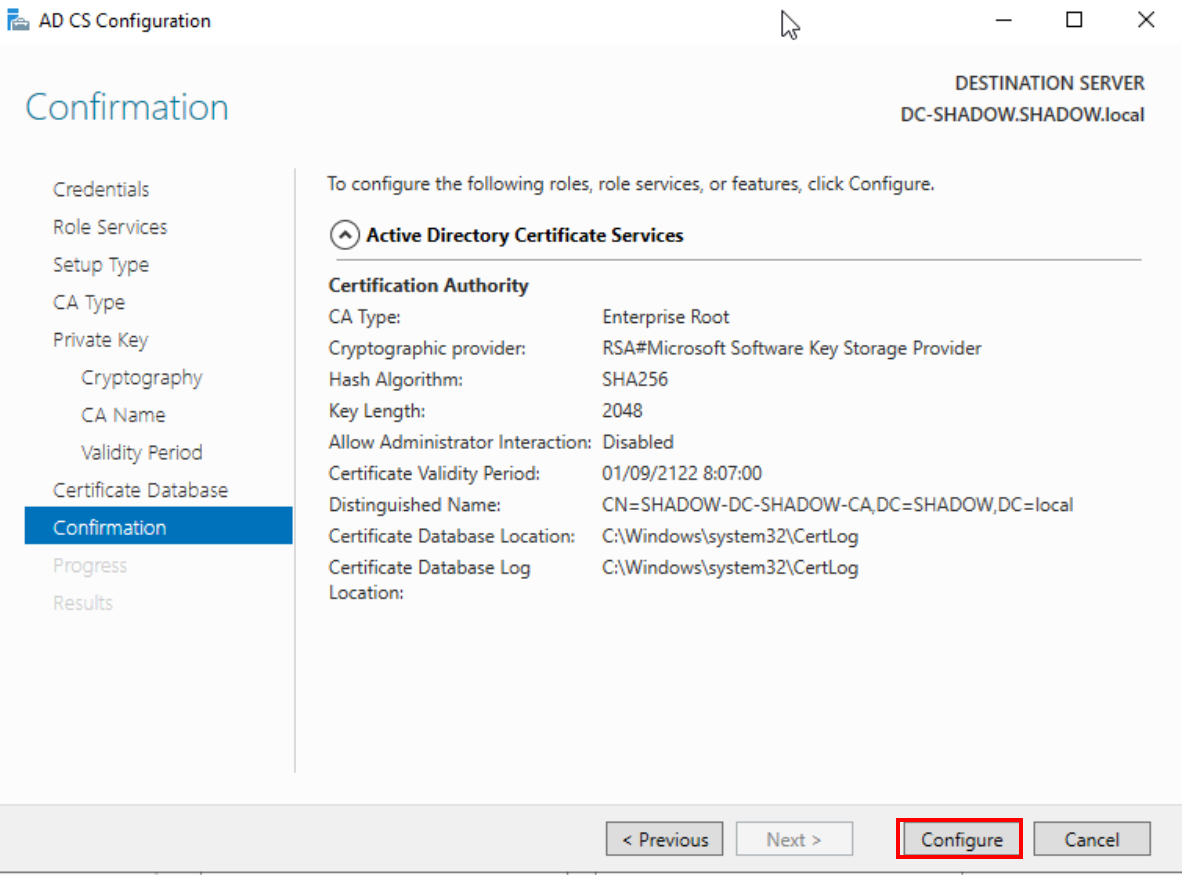
Final configuration
User creation
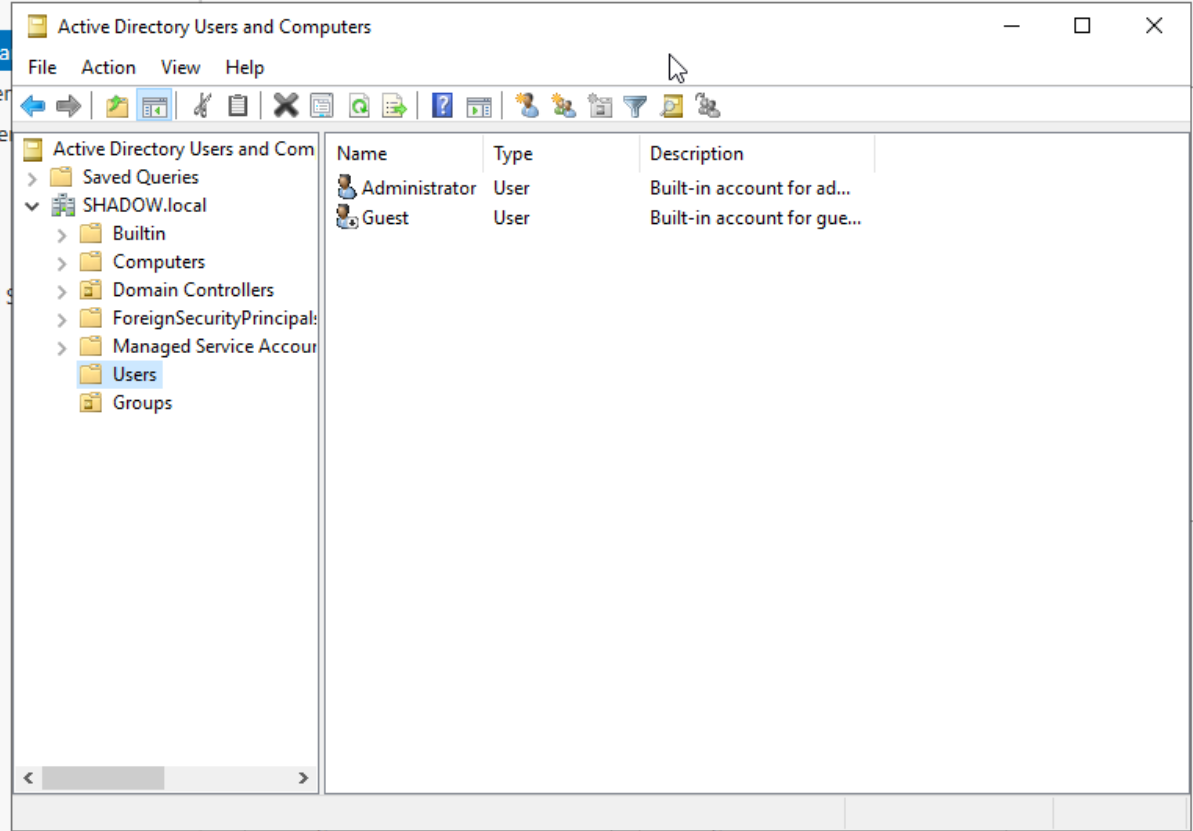
With the essential setup done, let’s populate our domain with users. Navigate to ‘Tools’ and select ‘Active Directory Users and Computers.’
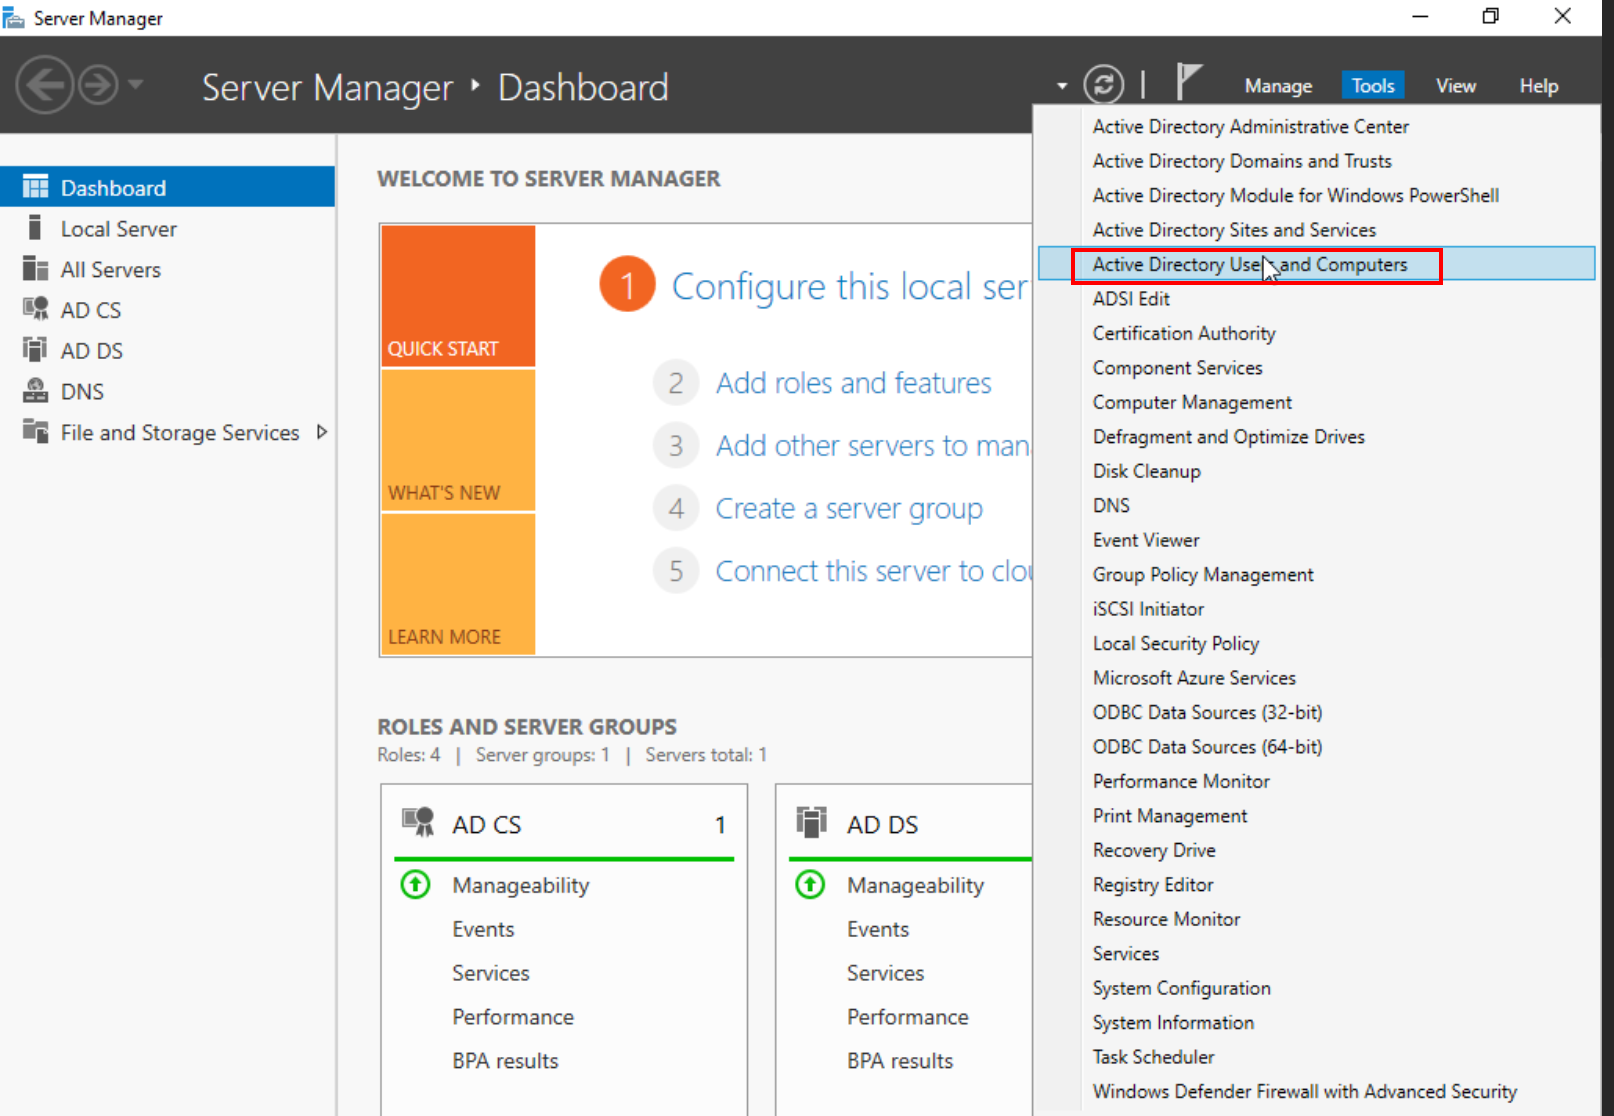
Active Directory Users and Computers
Organize by creating a new ‘Groups’ organizational unit. Migrate all objects except ‘Administrator’ and ‘Guest’ from the ‘Users’ unit into this new group.
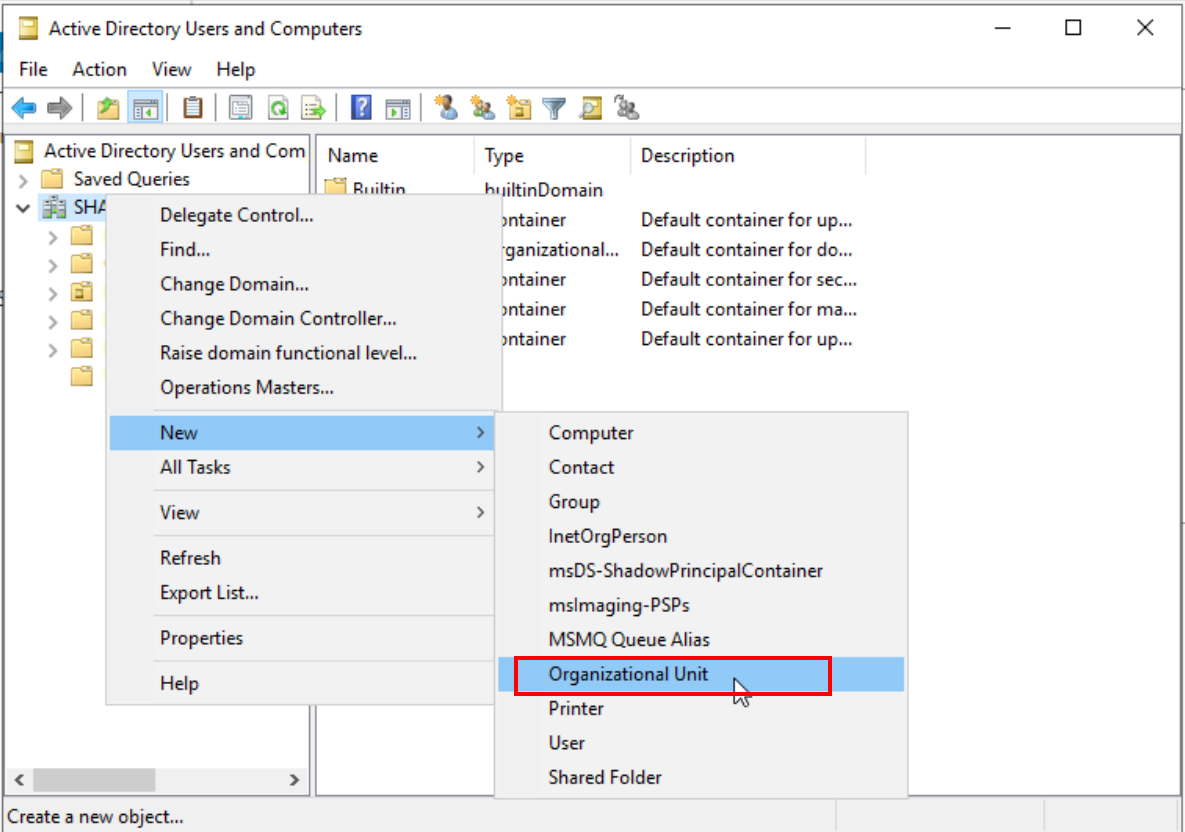
Creation of new organizational unit

“Groups” unit
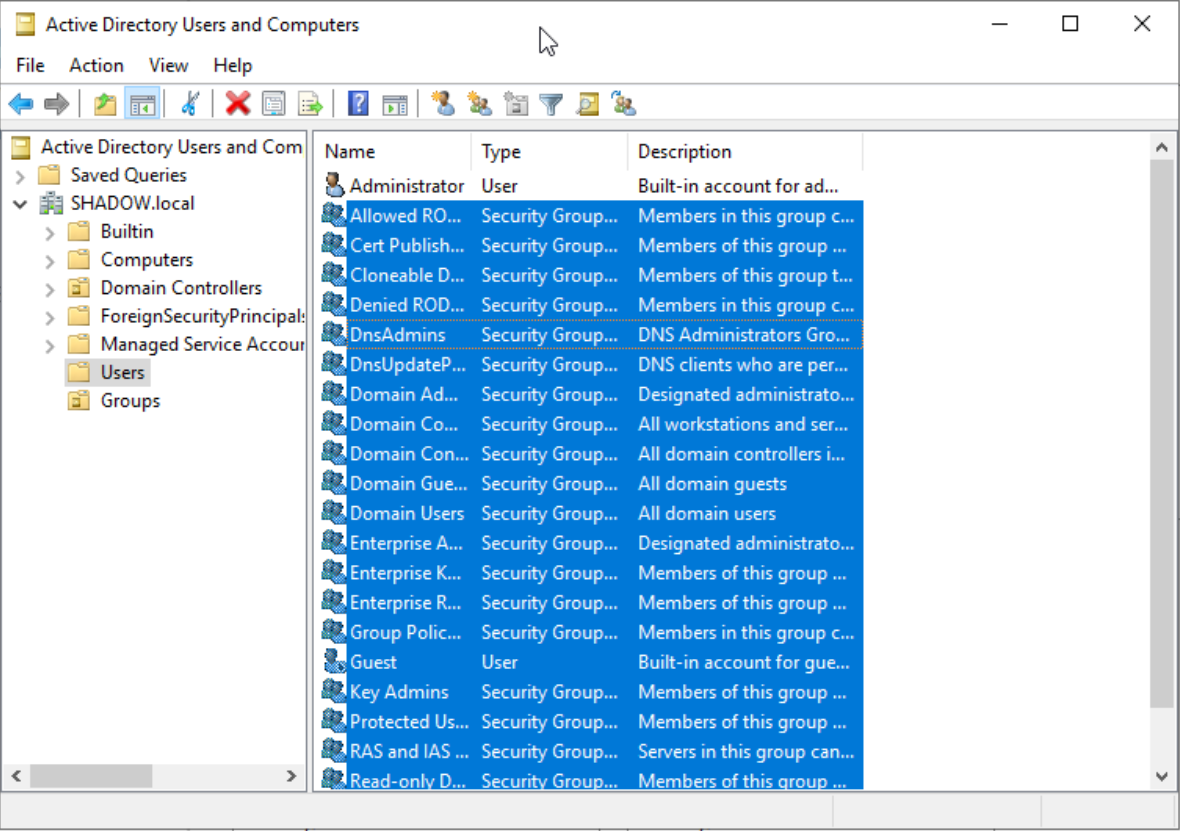
Copy all the groups to their corresponding unit
Organized User unit
Now, for the fun part - creating a new user. Right-click in the Users unit, select ‘New -> User,’ and fill in the details. Choose a memorable logon name and a not-so-secure password for easy attack practice. Make sure the password doesn’t expire too often for convenience.
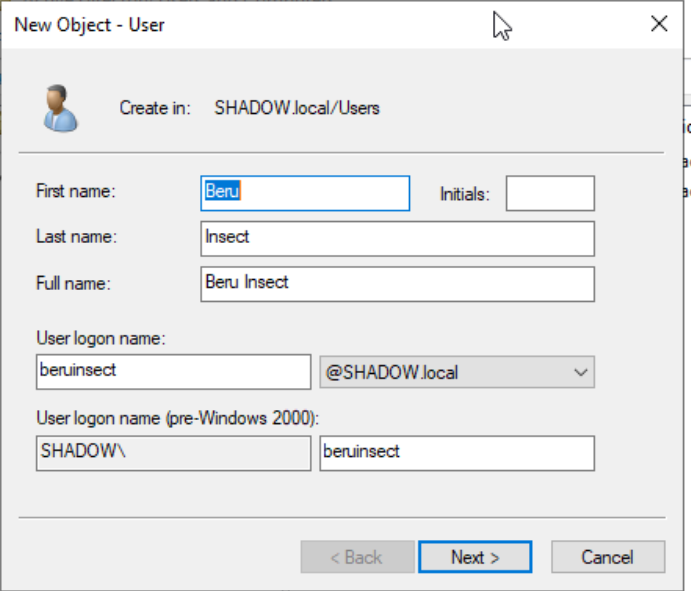
User creation interface
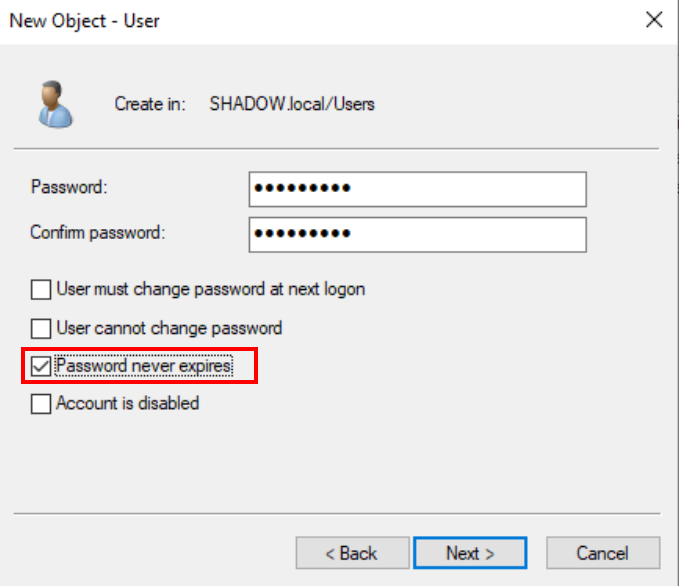
Setting the password to never expire
To simulate a common enterprise scenario, create a service account, like a SQL account, using your first user as a template.
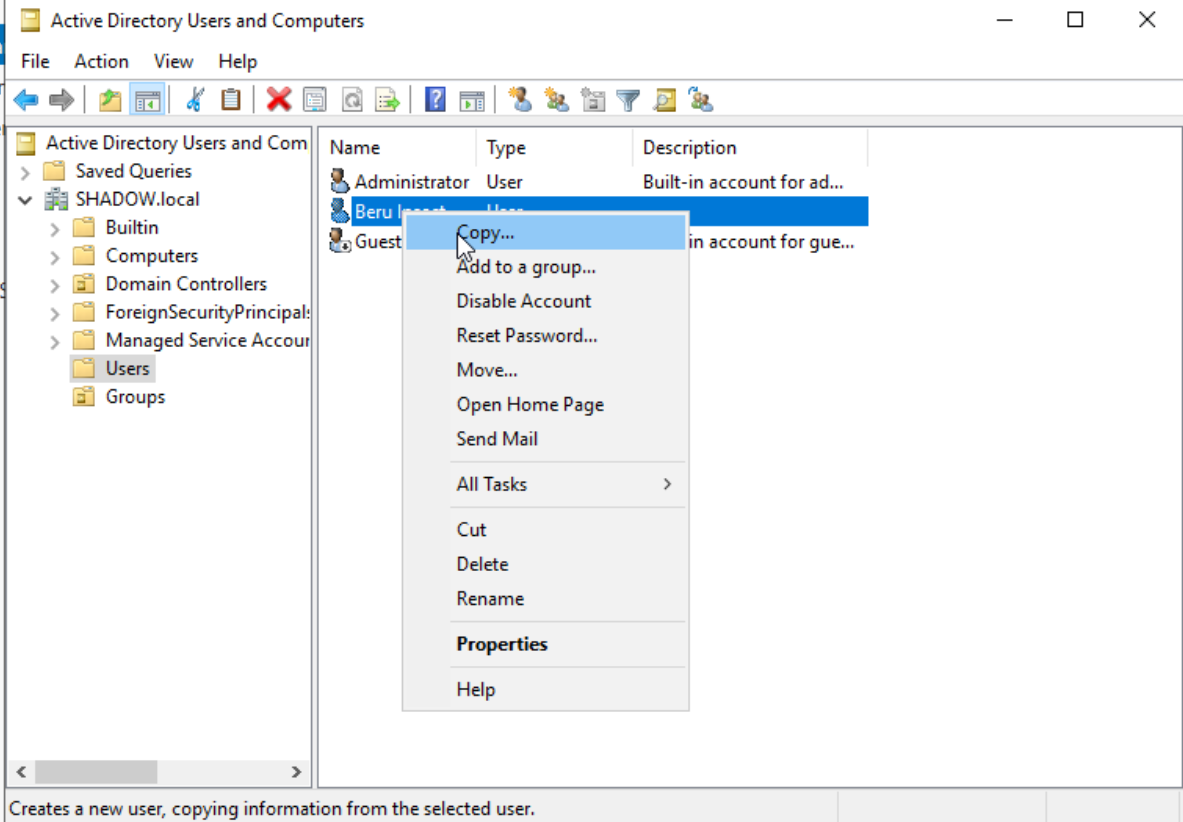
We use the user created as a template
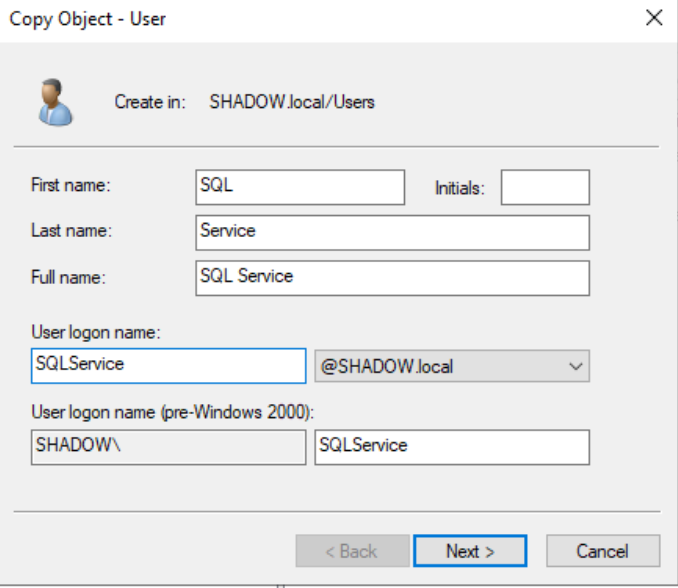
SQL Service user created
Add a password hint in the description as a nod to common administrative oversights.
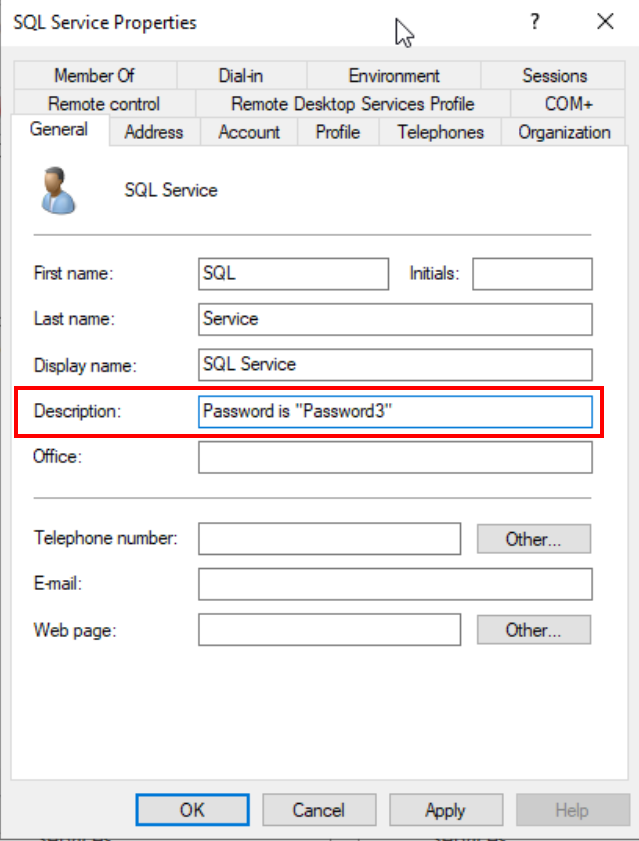
User description with password
Promote this account to a service account using the ‘setspn’ tool via CMD.
setspn -a DC-SHADOW/SQLService.SHADOW.local:60111 SHADOW\SQLService
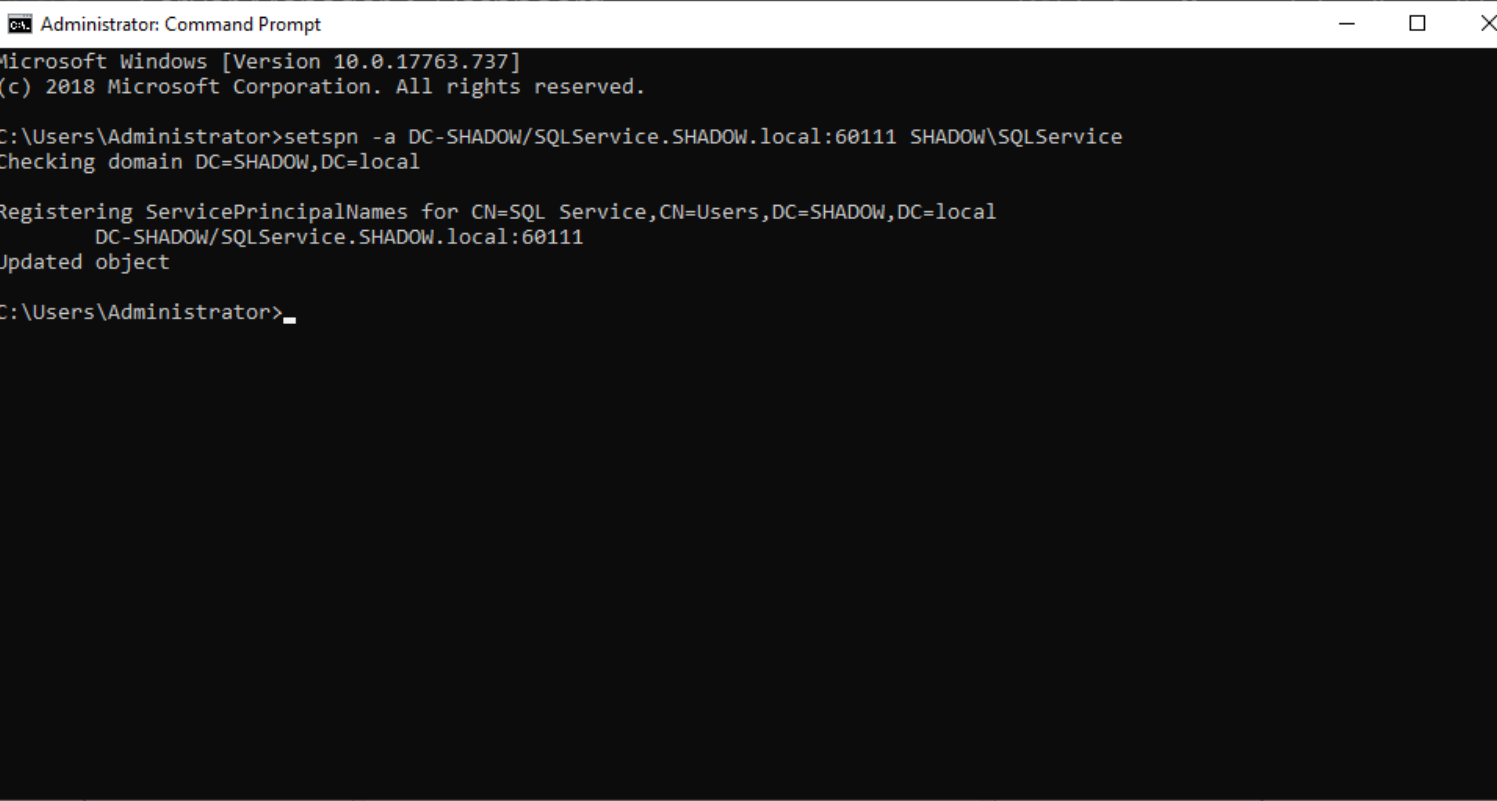
Make SQL account Service account
To verify that it has been successfully created, we can use the following command:
setspn -T SHADOW.local -Q */*
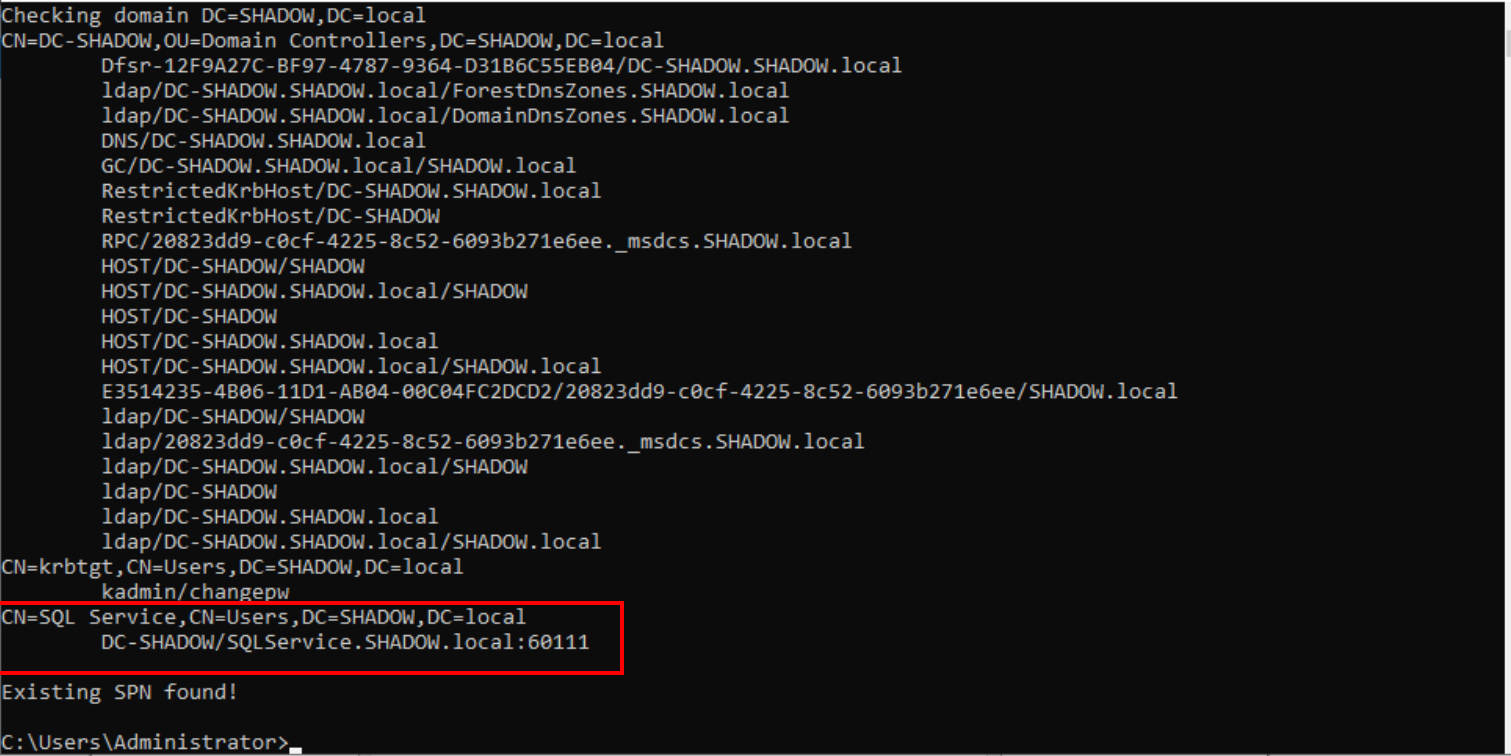
Show all service accounts
Shared folder setup
Setting up SMB is crucial for various reconnaissance and attack practices. Start by creating a ‘Resources’ shared folder on the C drive.

Creation of the “Resources” shared folder
Head to ‘File and Storage Services’ in the Server Manager and opt to create a new folder.

File and Storage Services
Here, in “Tasks” we will select that we want to create a new folder.
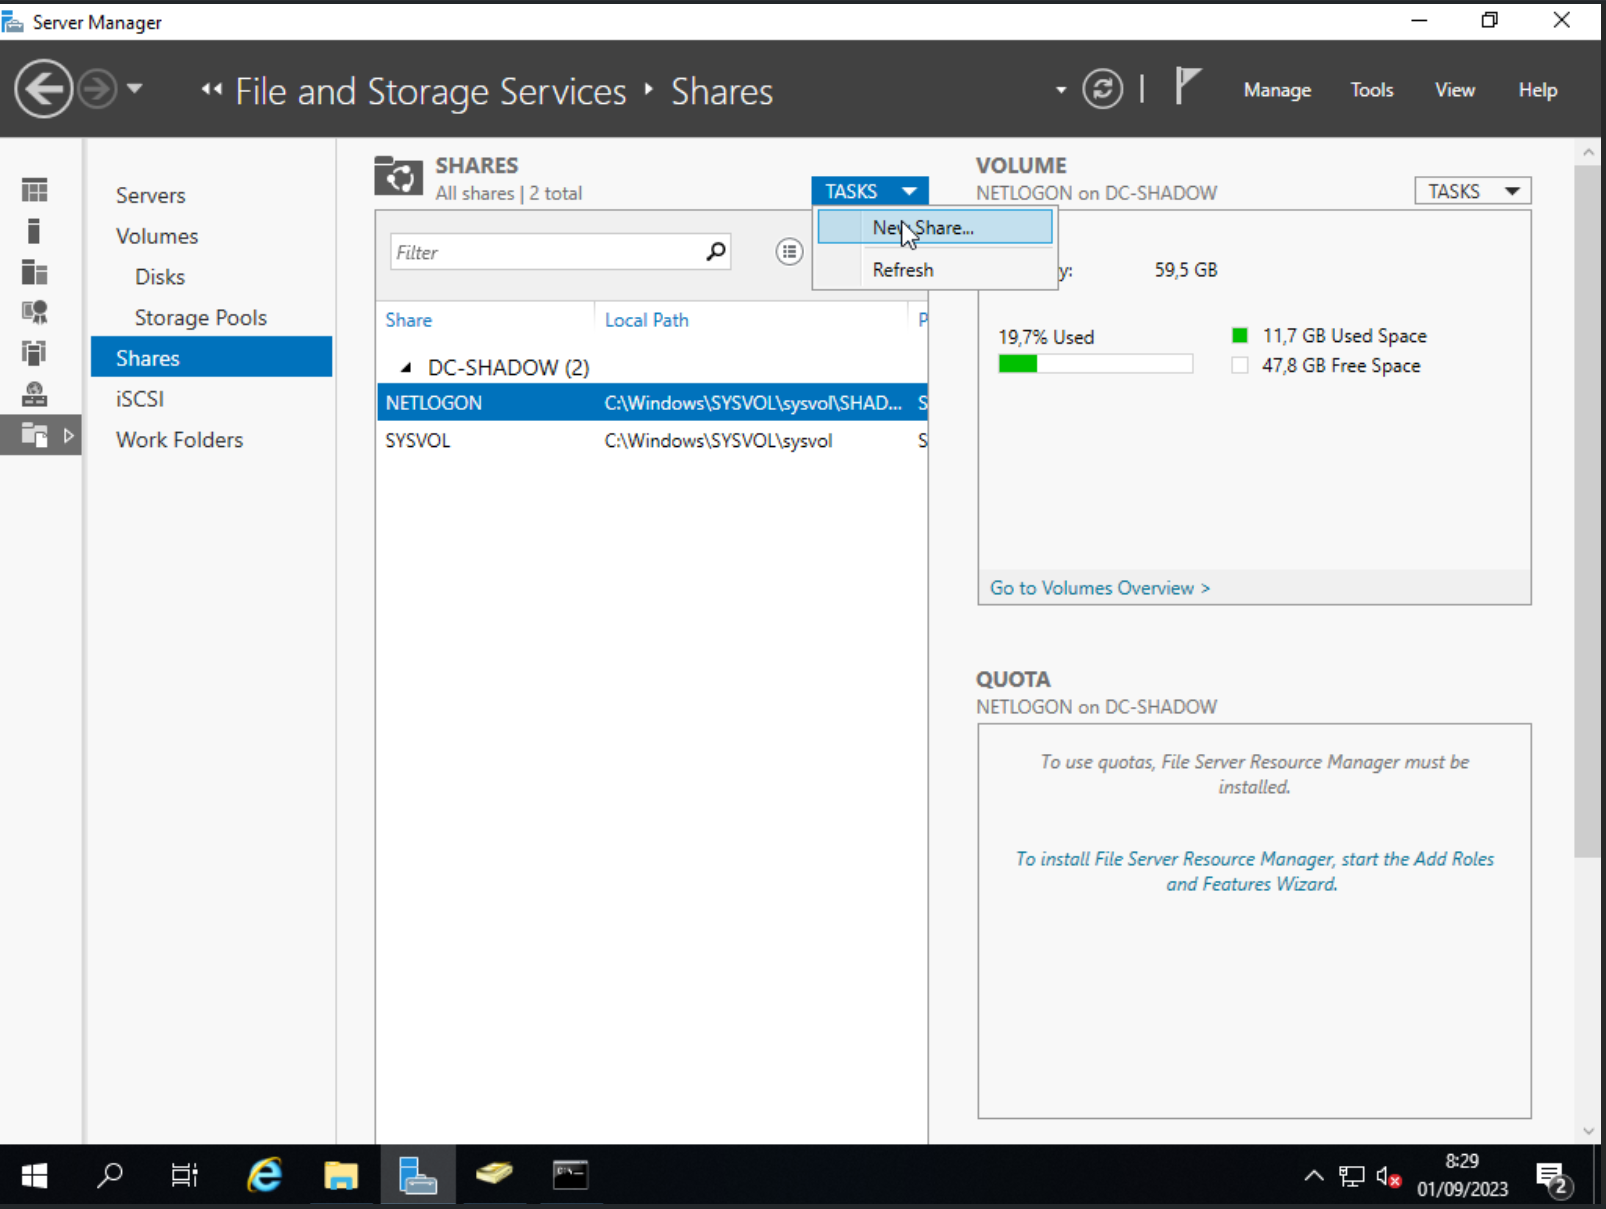
Creation of new folder
In this configuration screen the only thing we will have to do is to specify the location of the folder we have just created in “Share location”.
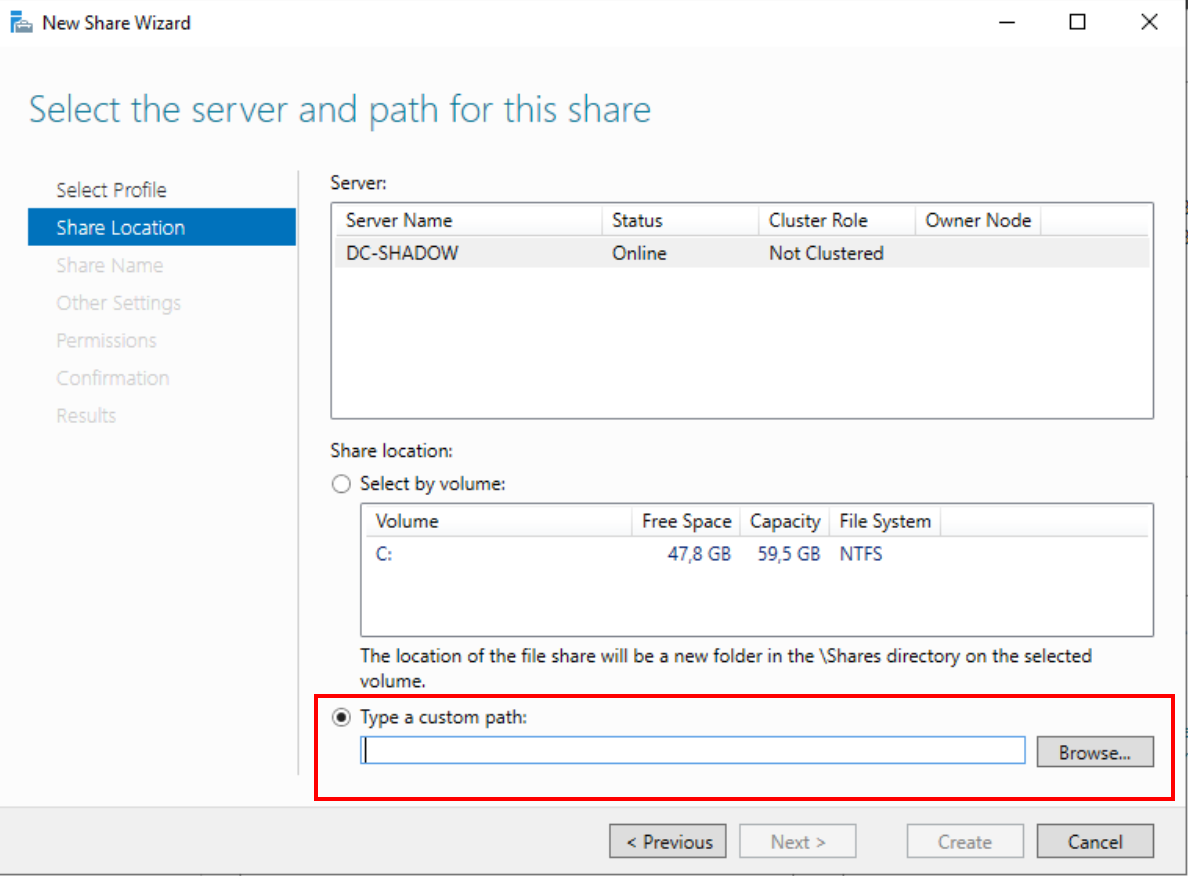
Sharing folder path
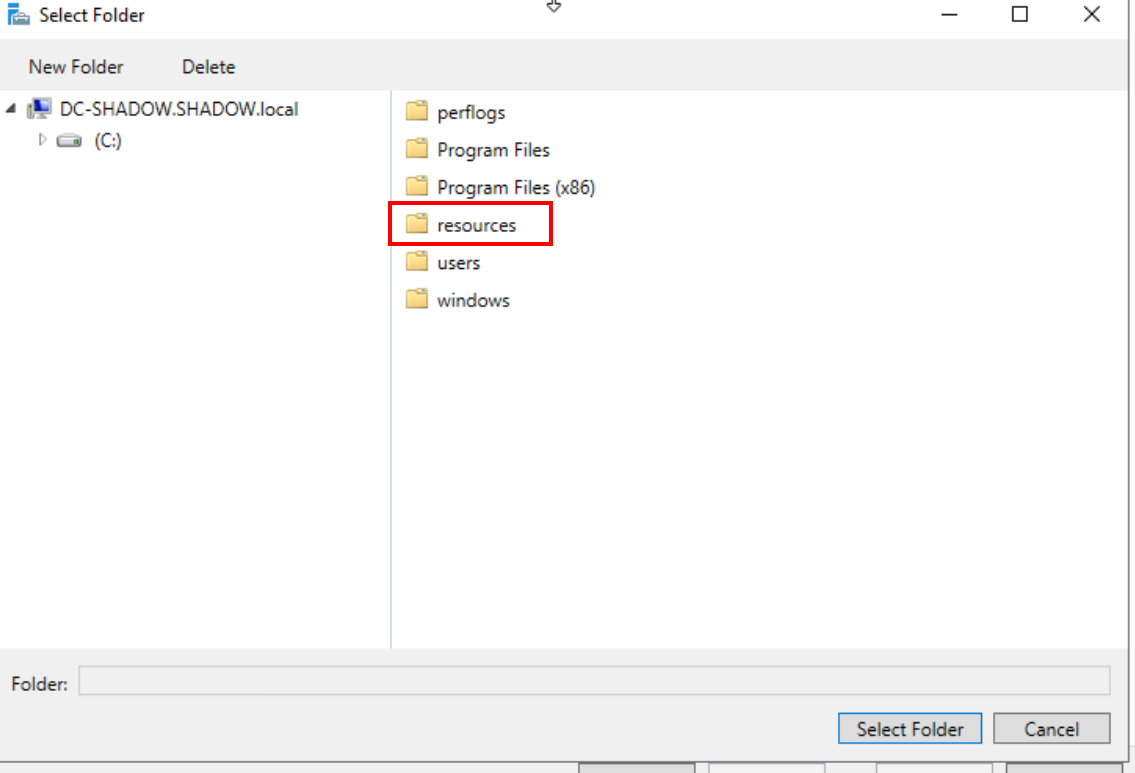
Selection of previously created folder
Once this is done, we will continue until the configuration is complete.
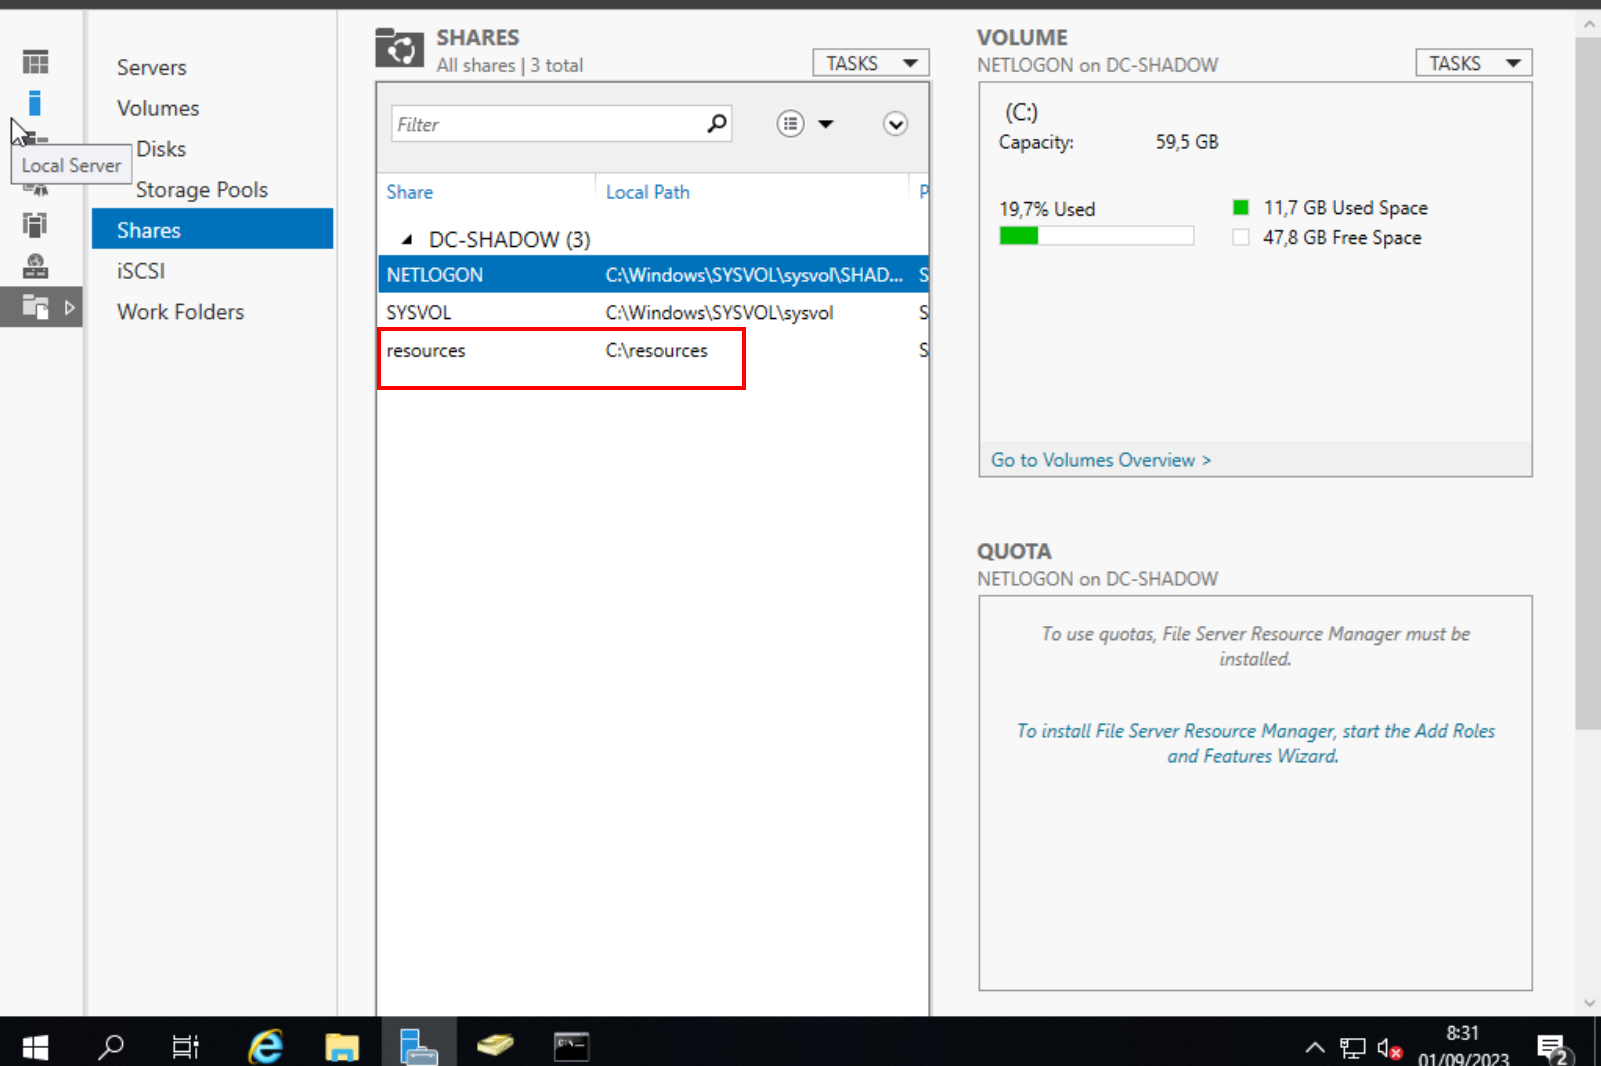
Continue until the configuration is complete
This is all for the basic configuration of the domain controller, now we will move on to the Windows machines that you want to join the domain.
Prepping Windows Machines for Domain Integration
Continuing with our detailed guide, let’s focus on preparing each computer for domain integration. This process is essential for all machines you plan to include in your domain. Here’s how you can seamlessly integrate them:
Renaming Your Computer:
- Start by giving each computer a unique identifier that aligns with your domain’s theme or preference.
- Locate the ‘Rename your PC’ option in the Windows search bar. This simple step allows you to personalize each machine, making it easier to distinguish them within your network.
- After selecting an appropriate name, proceed through the prompts and complete the process with a system restart.
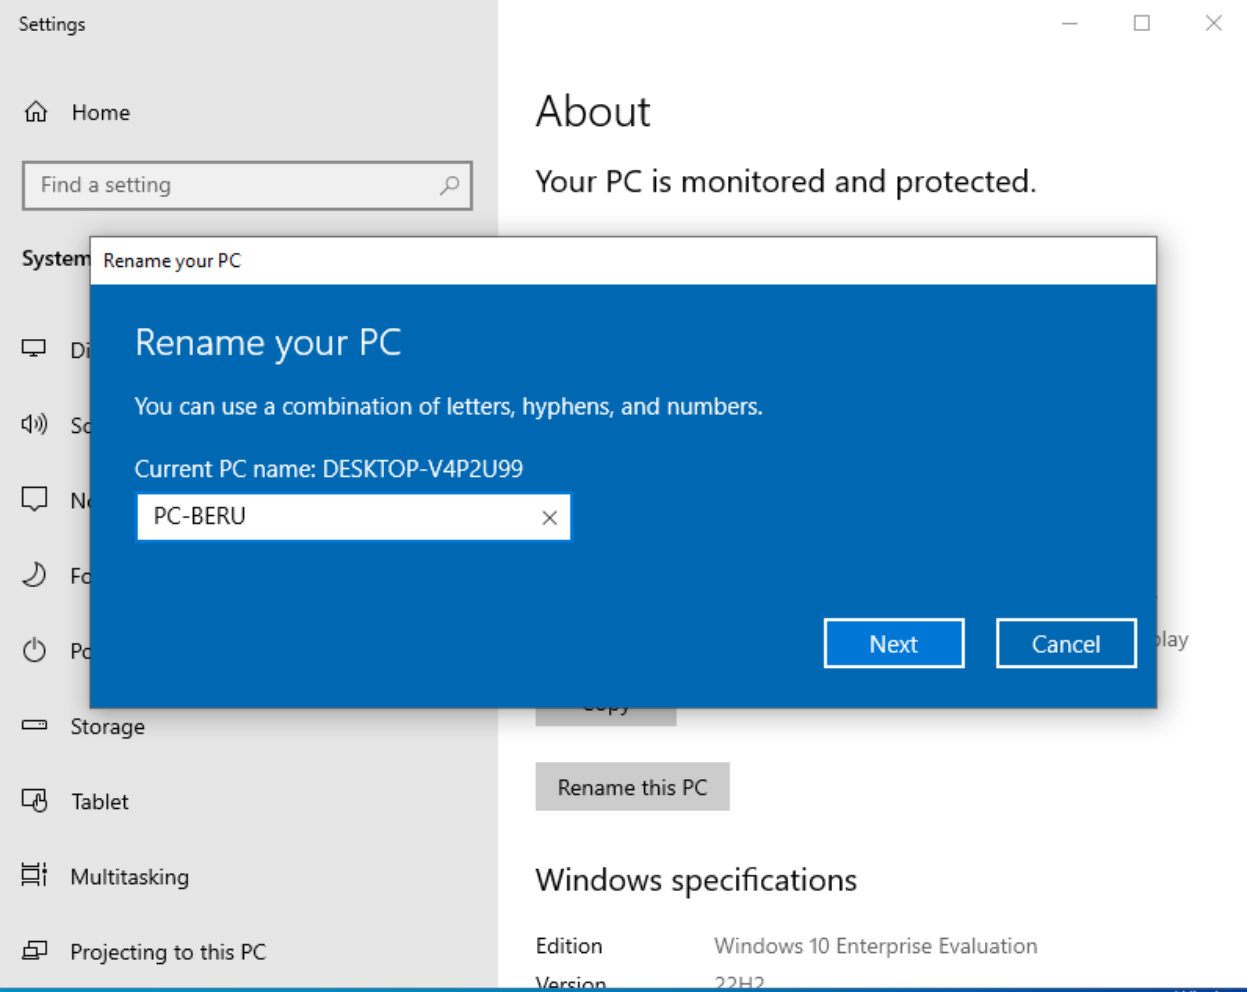
Change of machine name
Setting up the DNS for Machine Integration into the Domain
To integrate your machine into the newly created domain, it’s crucial to configure its Domain Name System (DNS) settings. This step is pivotal in ensuring seamless communication between your machine and the domain controller.
Begin by opening the Windows Internet settings. Here, navigate to “Change adapter options” to modify network configurations.
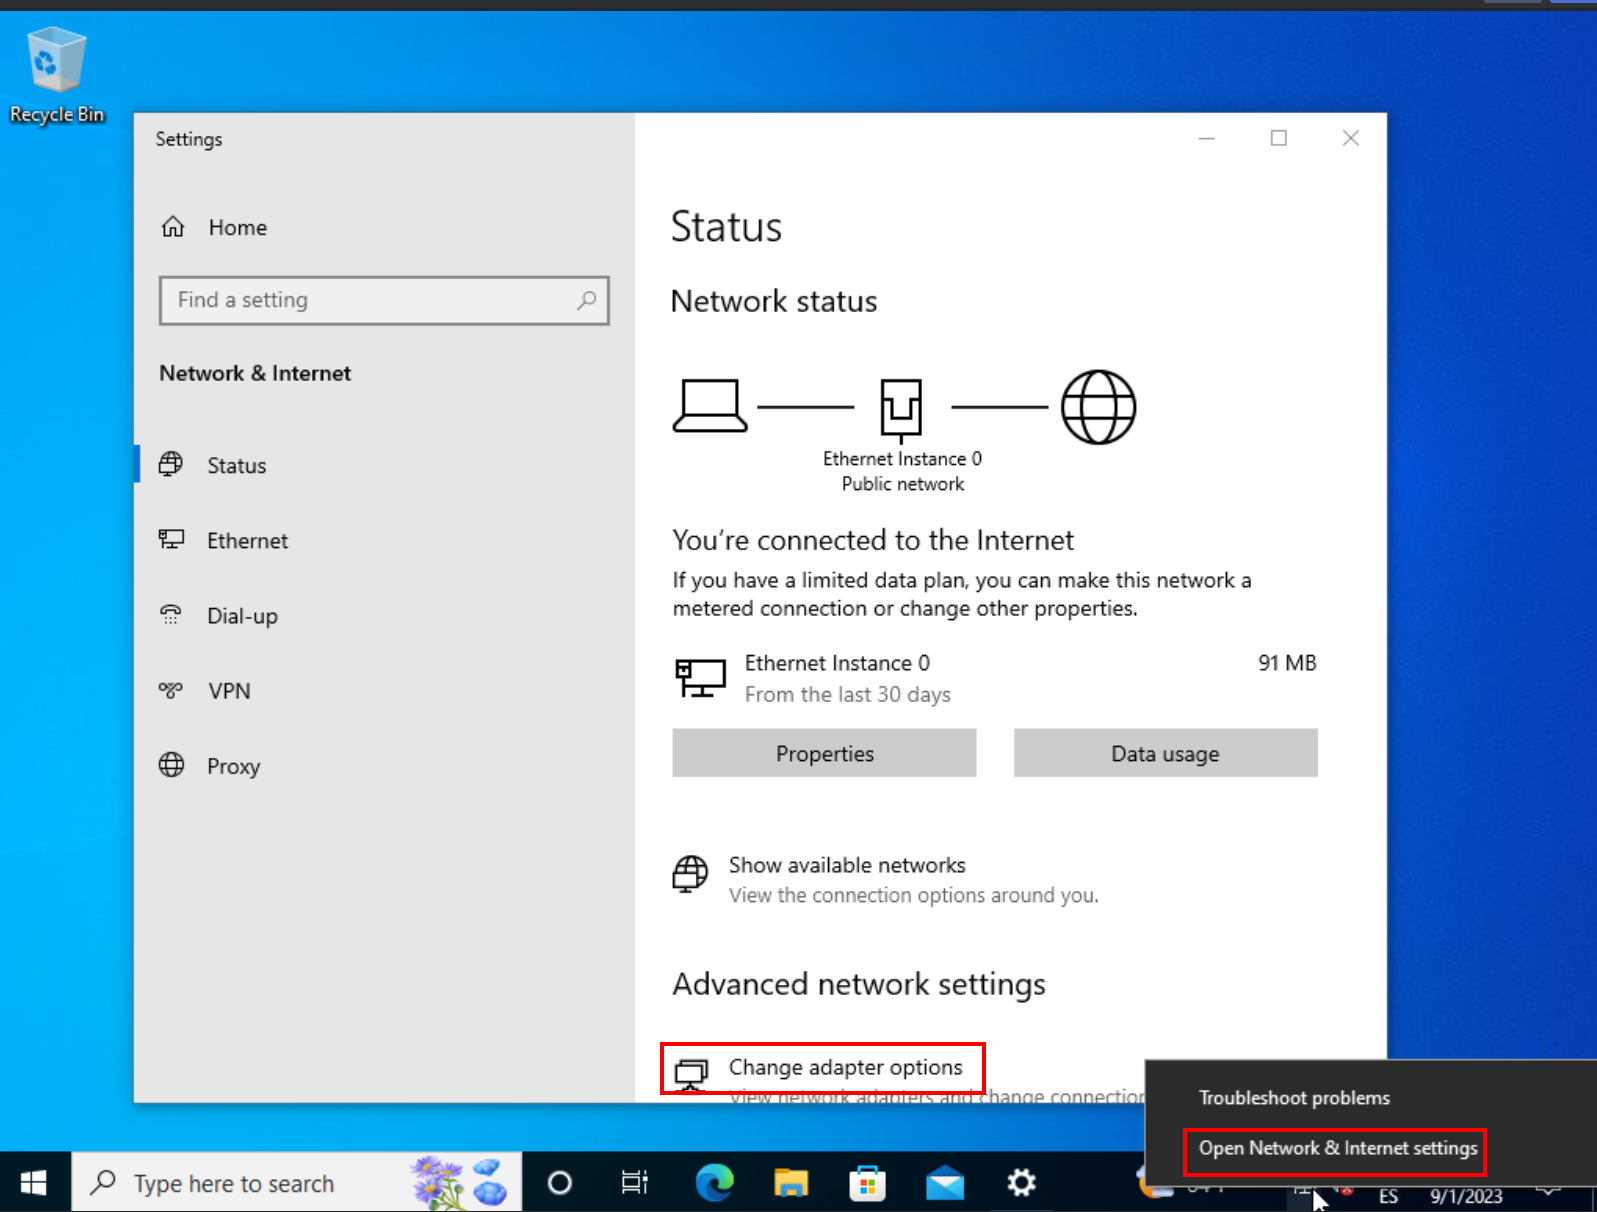
Internet settings
Configuring DNS
Dive into the settings of Ethernet instance 0. Look for ‘Properties’ and then select “Internet Protocol Version 4 (TCP/IPv4)”.
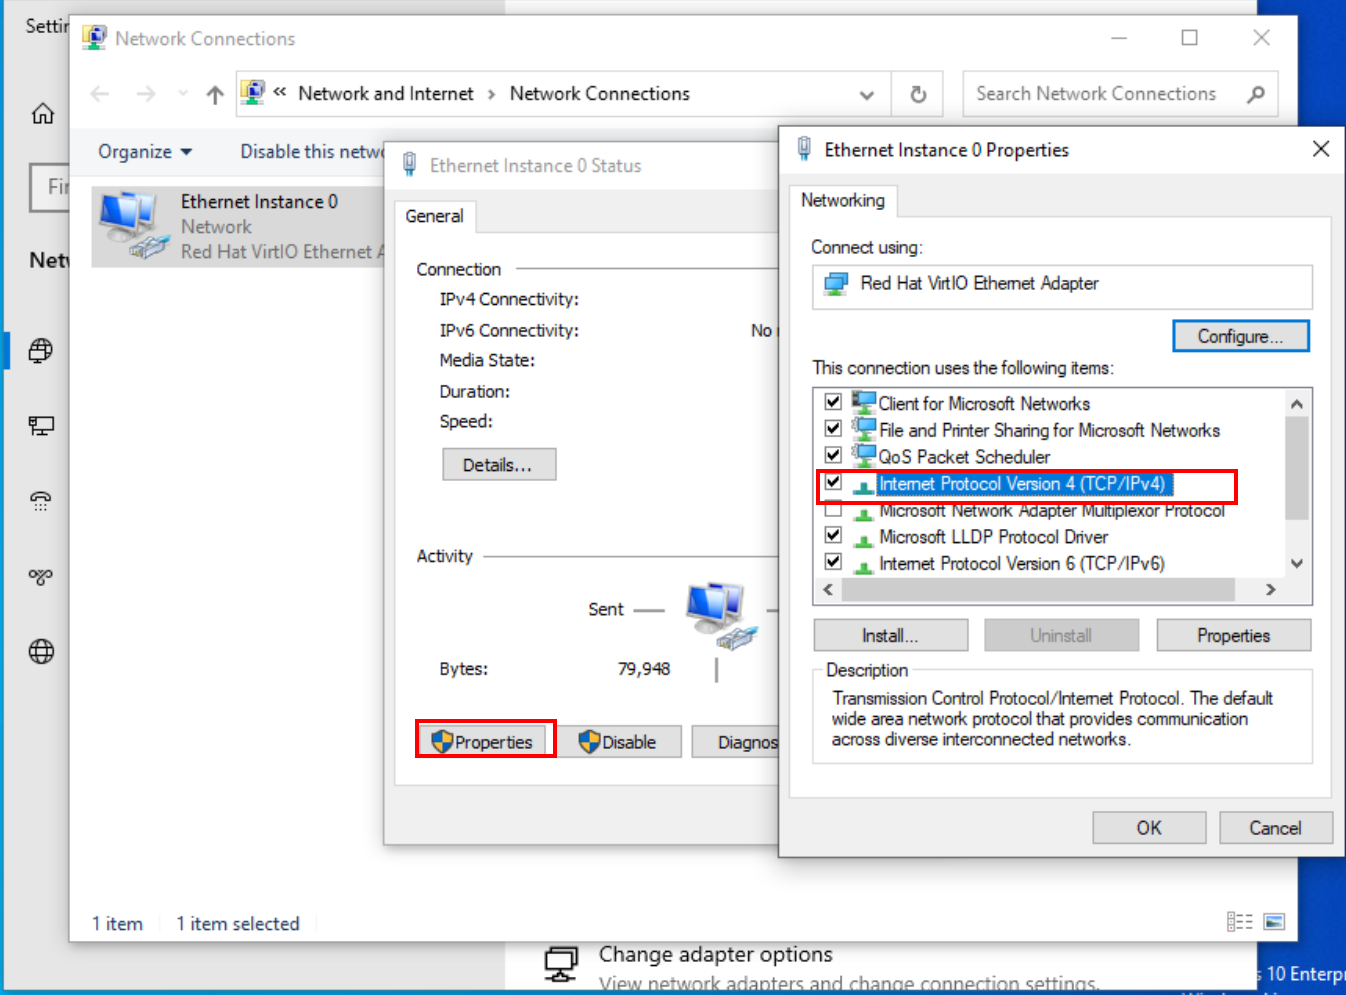
Access to the IPv4 configuration of the computer
In the DNS section, you’ll need to input the IP address of your domain controller. This is the central hub of your network, and directing your machine to communicate with it is essential for successful domain integration.
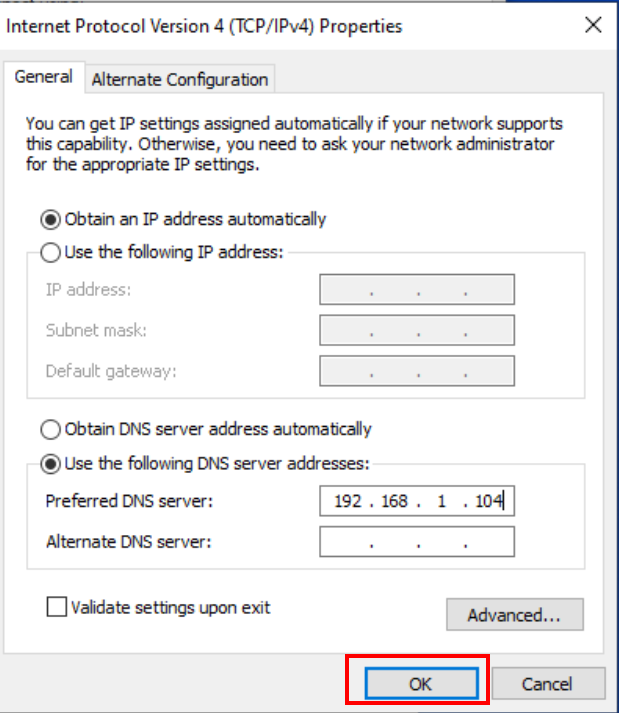
Configure the DNS with the IP of the domain controller
To retrieve the IP address of your domain controller, use the ipconfig command in the Command Prompt (CMD) on the domain controller itself.
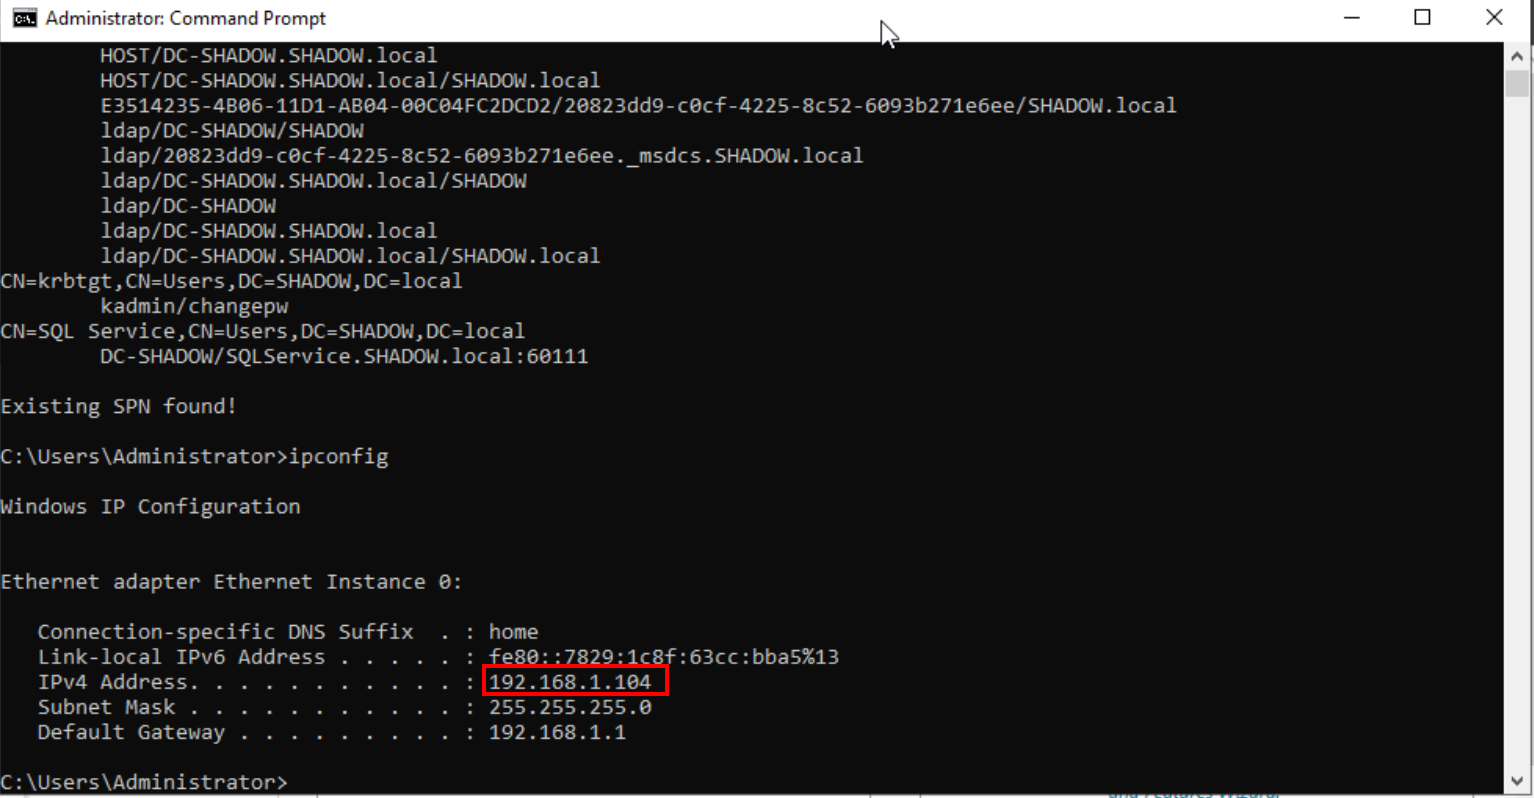
IP of the domain controller
Once your DNS settings are in place, test the configuration. A simple yet effective way to do this is by pinging the domain you’ve established. This will confirm whether your machine is correctly recognizing and communicating with the domain controller.
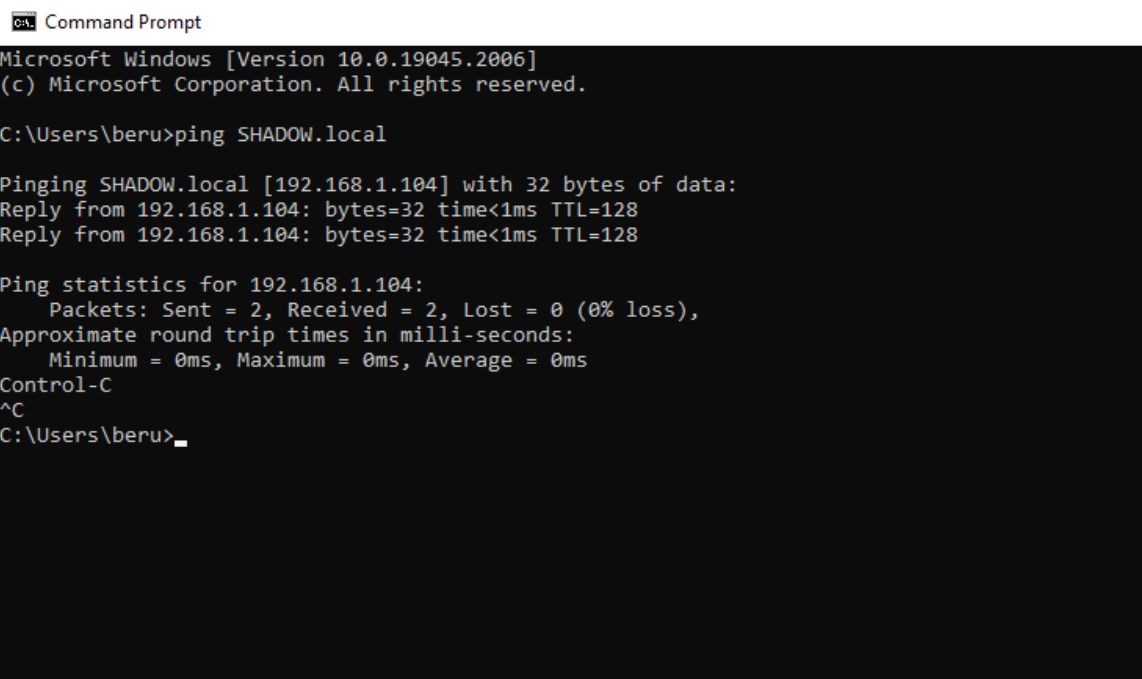
A sign that we have reached the domain
Joining a Machine to Your Domain: Simplified Steps
To integrate a machine into your domain, the process is quite straightforward. Begin by searching for “Access work or school” in the Windows search bar. Inside, you’ll find a “Connect” option, kicking off the configuration journey. Here, select “Join this device to local Active Directory domain” to proceed.
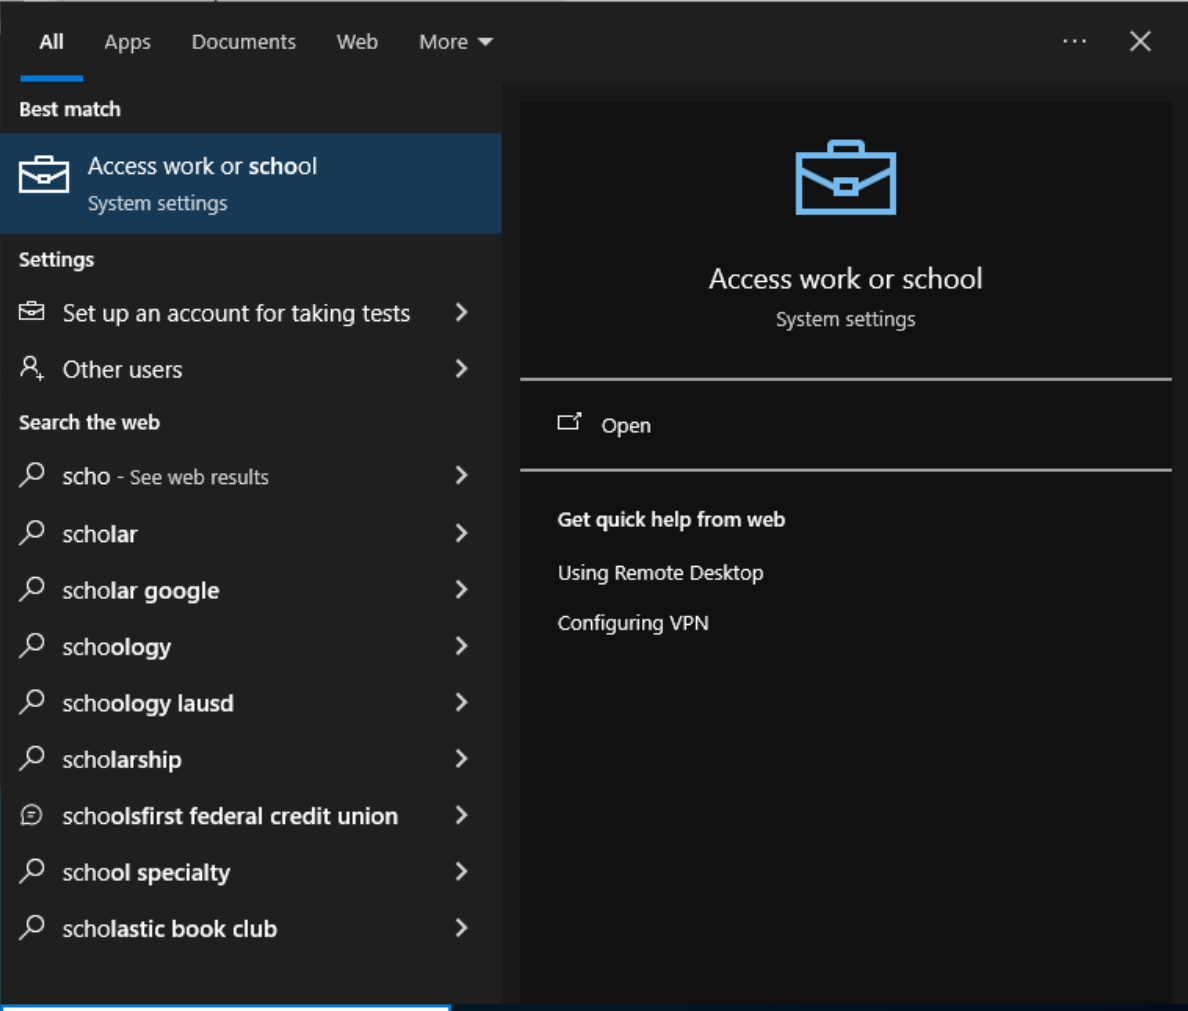
Search for “Access Work or school”
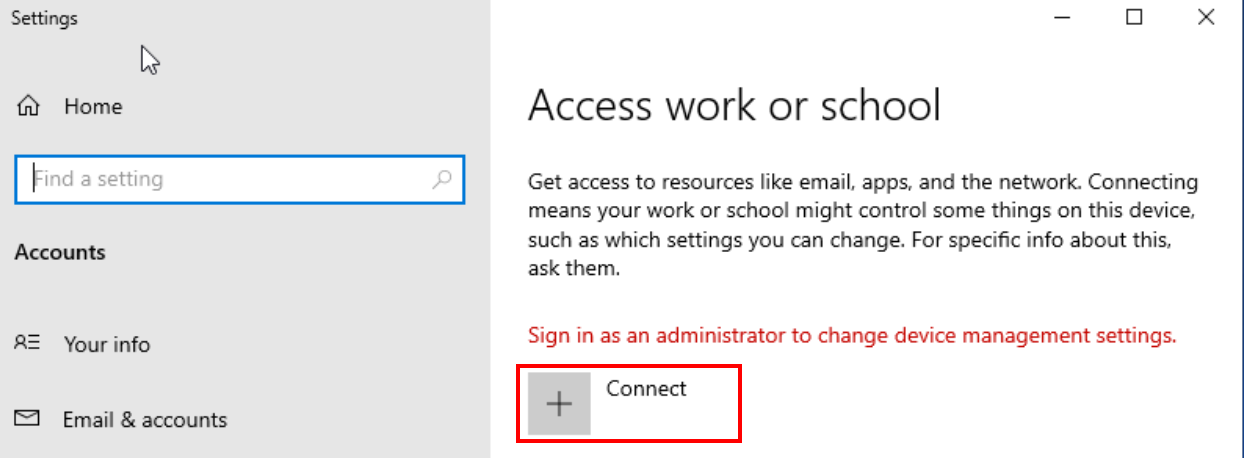
Option to connect to an active directory
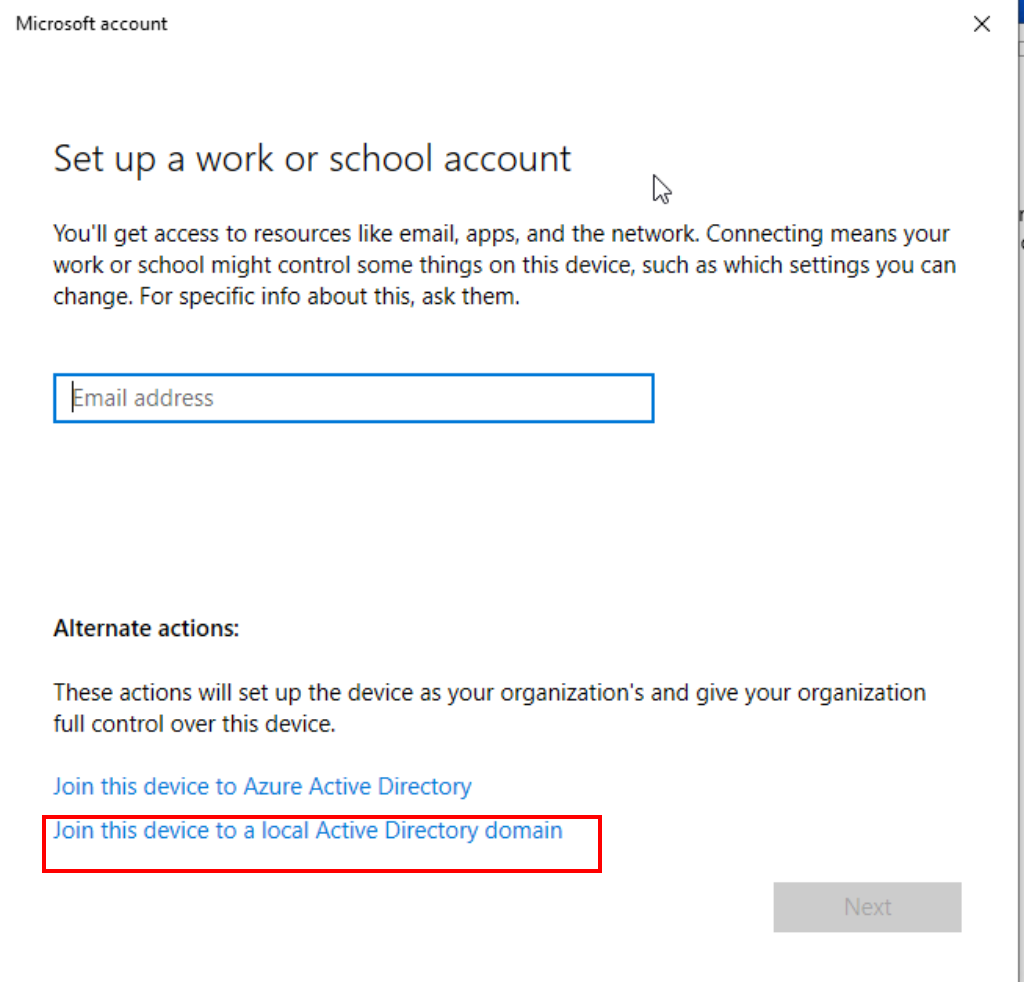
Join this device to a local Active Directory domain
Next, you’ll be prompted to enter your domain name. This is the identity of your domain you established earlier.
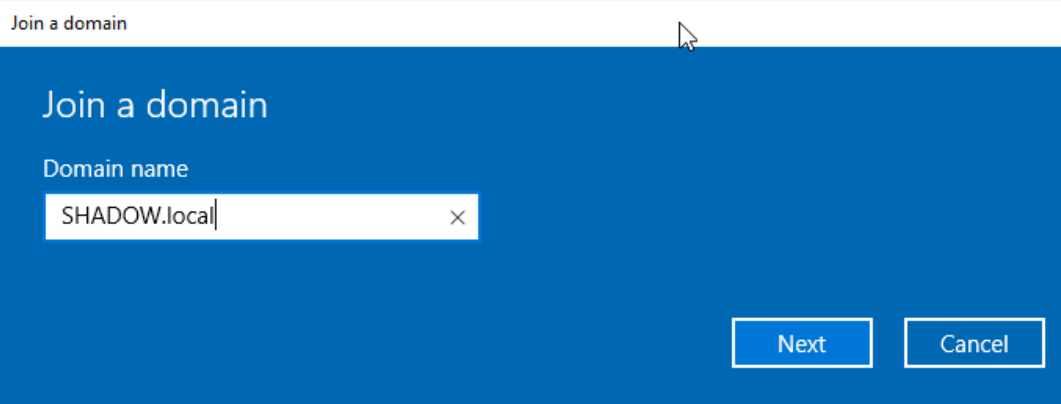
Enter our domain name
After inputting the domain name, you’ll need to authenticate. Enter the credentials of your domain administrator user, finalizing the connection of the machine to your domain.
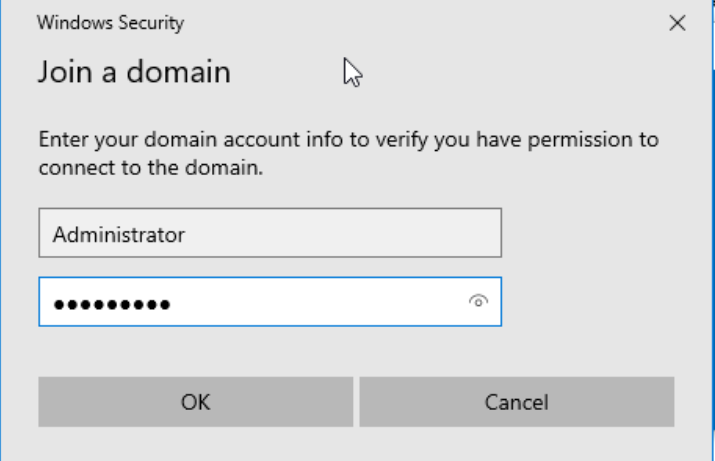
Enter domain administrator’s credentials
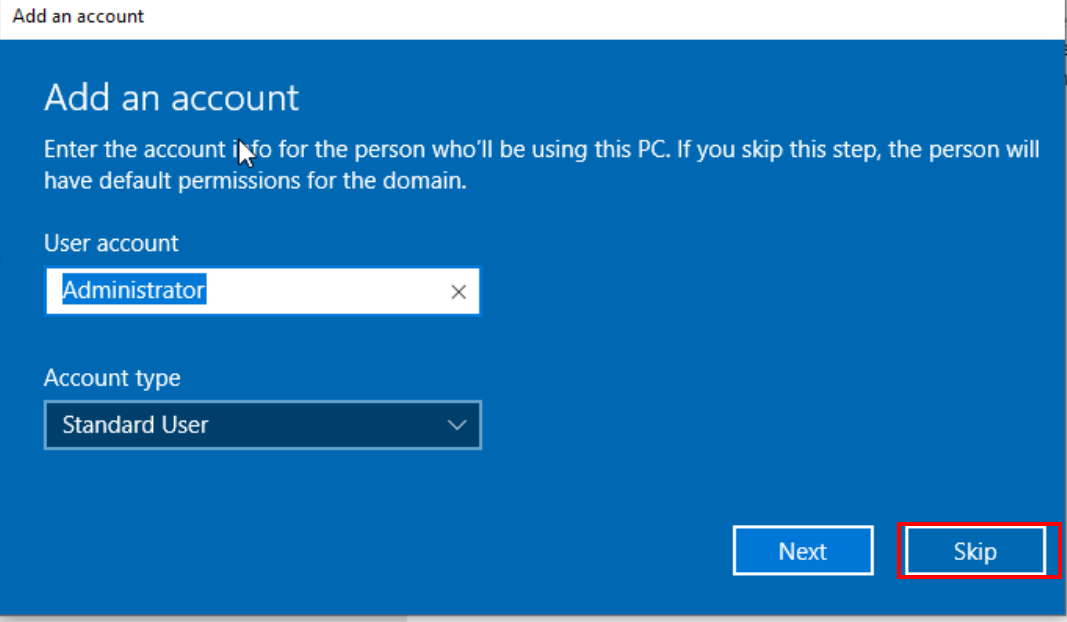
Add the account
Once these steps are completed, and if everything goes as planned, your newly added computer should proudly appear in the “Computers” unit of your domain controller, signifying a successful integration into your domain.
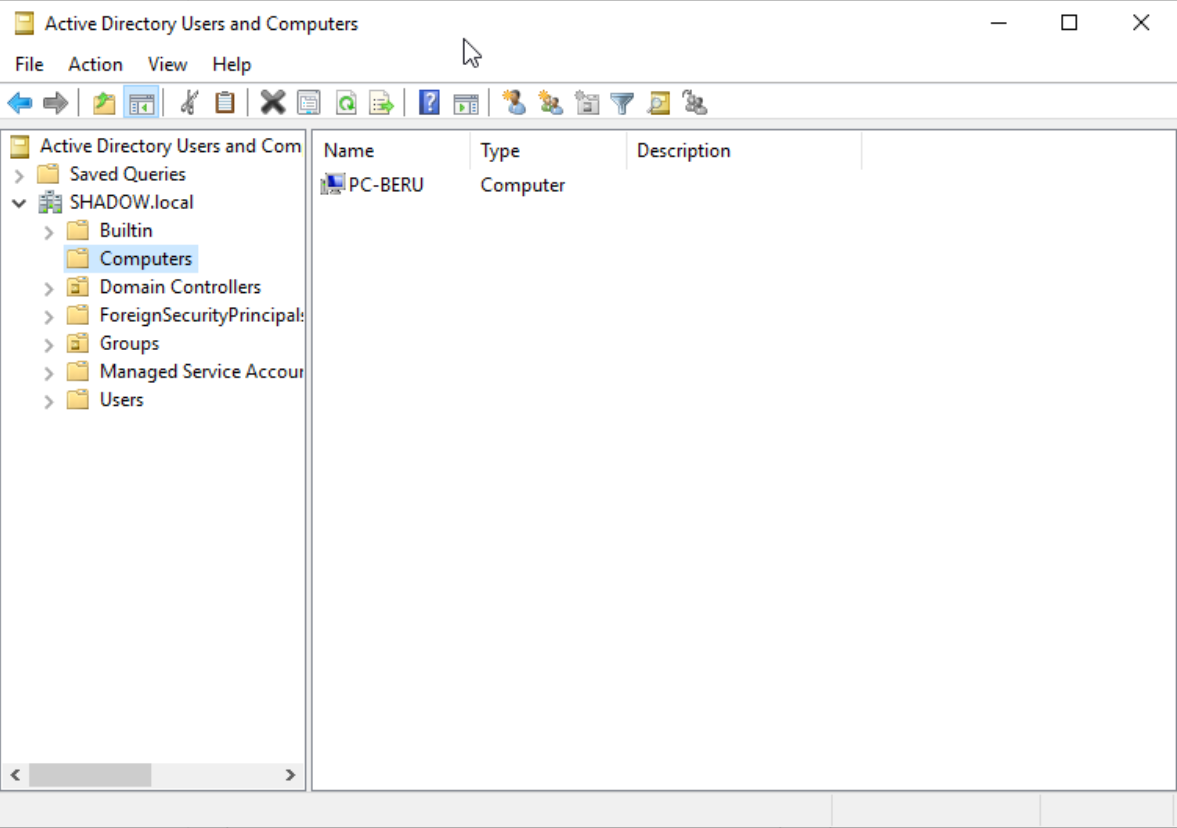
Computer sample attached correctly
Elevating a Domain User to Administrator: The How-To Guide
Elevating a user to an administrator level on a specific machine is a crucial step for many of the attacks we’ll explore. Let’s dive into how to achieve this. Start by logging into your Windows machine, either with a user previously created from the domain or directly through the domain administrator user, especially if you prefer not to run tools as an administrator.
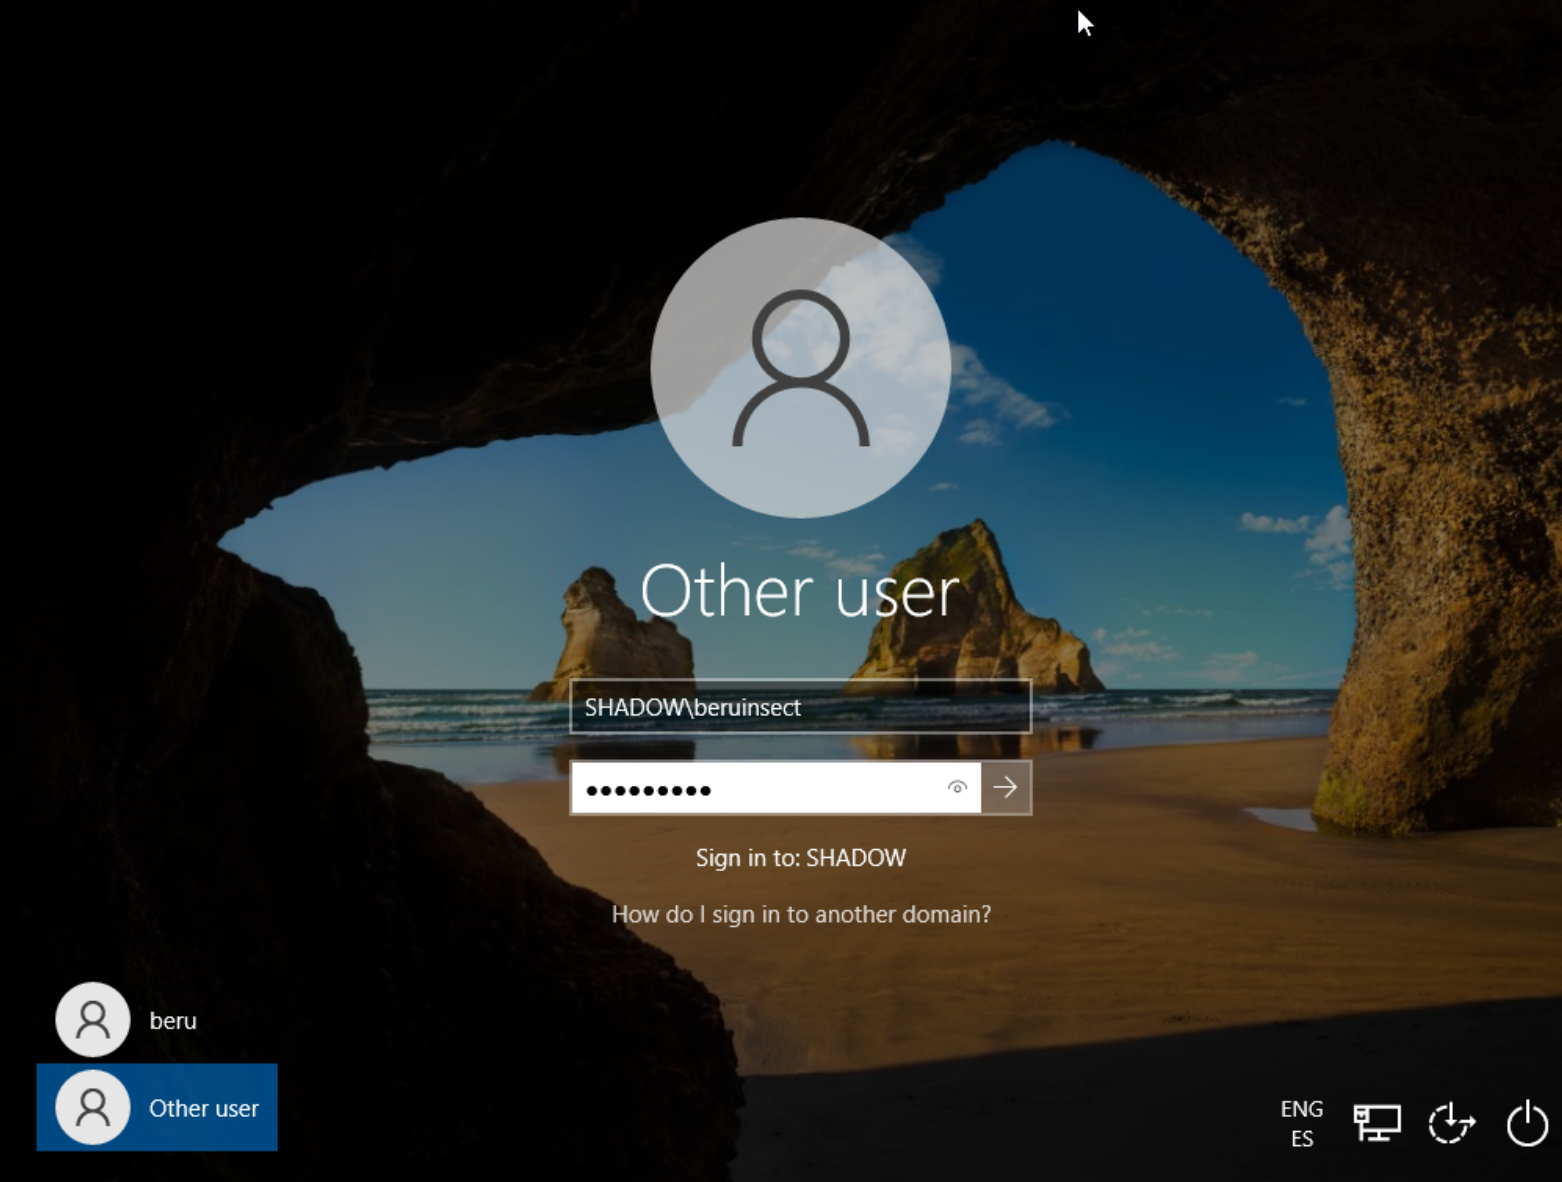
Access via user beruinsect
Your first stop is the “Computer Management” application. It’s your control room for managing users and groups. Inside, navigate to the “Groups” unit and locate the ‘Administrators’ group. Clicking on this group will reveal an “Add” button – this is your gateway to elevating a user’s status.
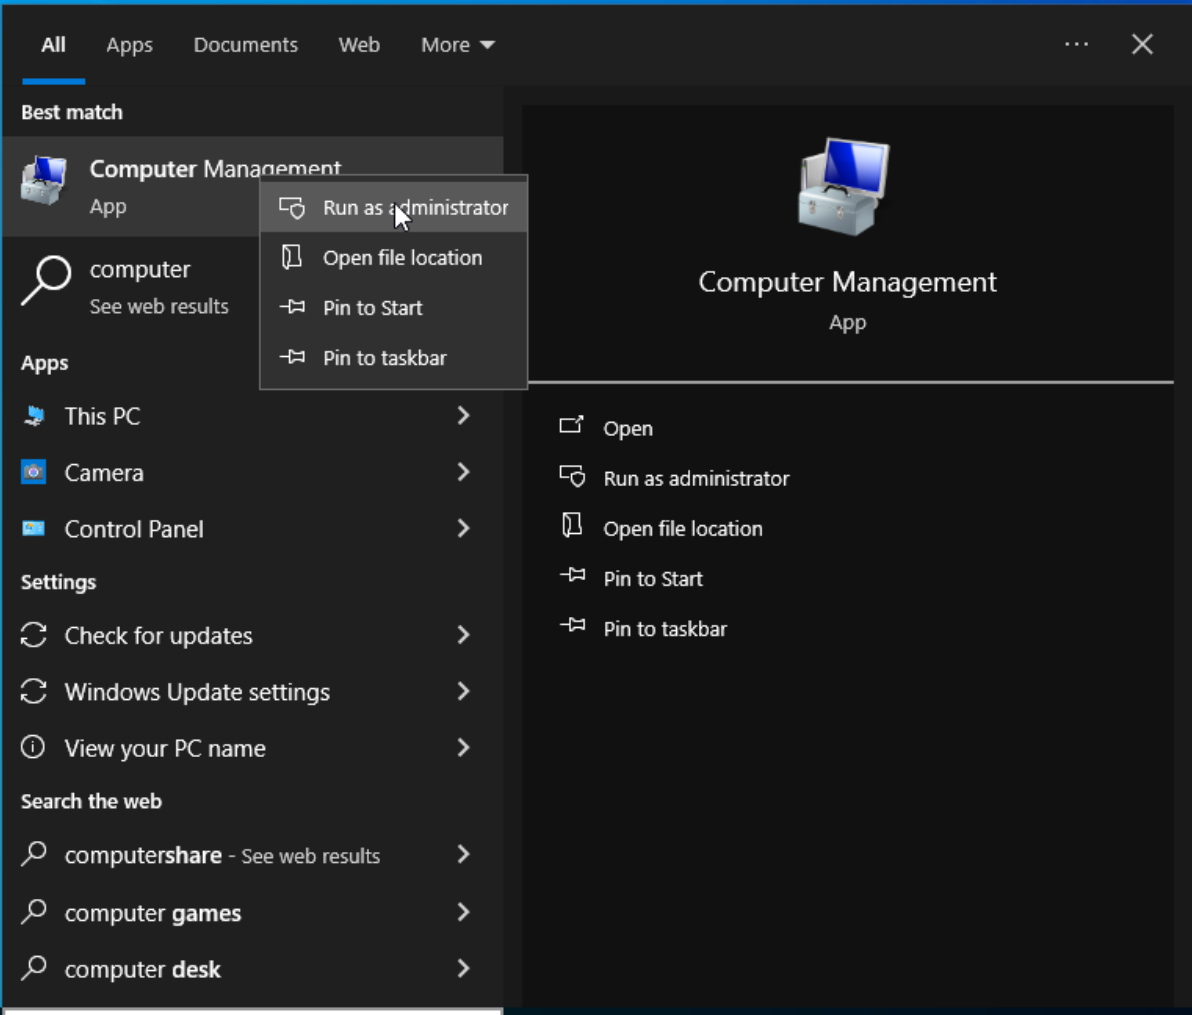
Running Computer Management as administrator
Here’s where the magic happens. Search for the user you wish to elevate – in our example, let’s use “beru.” A handy feature here is the “Check Names” option, which helps in auto-completing the user name, streamlining the process. Once you’ve selected your user and confirmed the name, they are on their way to joining the ranks of administrators.
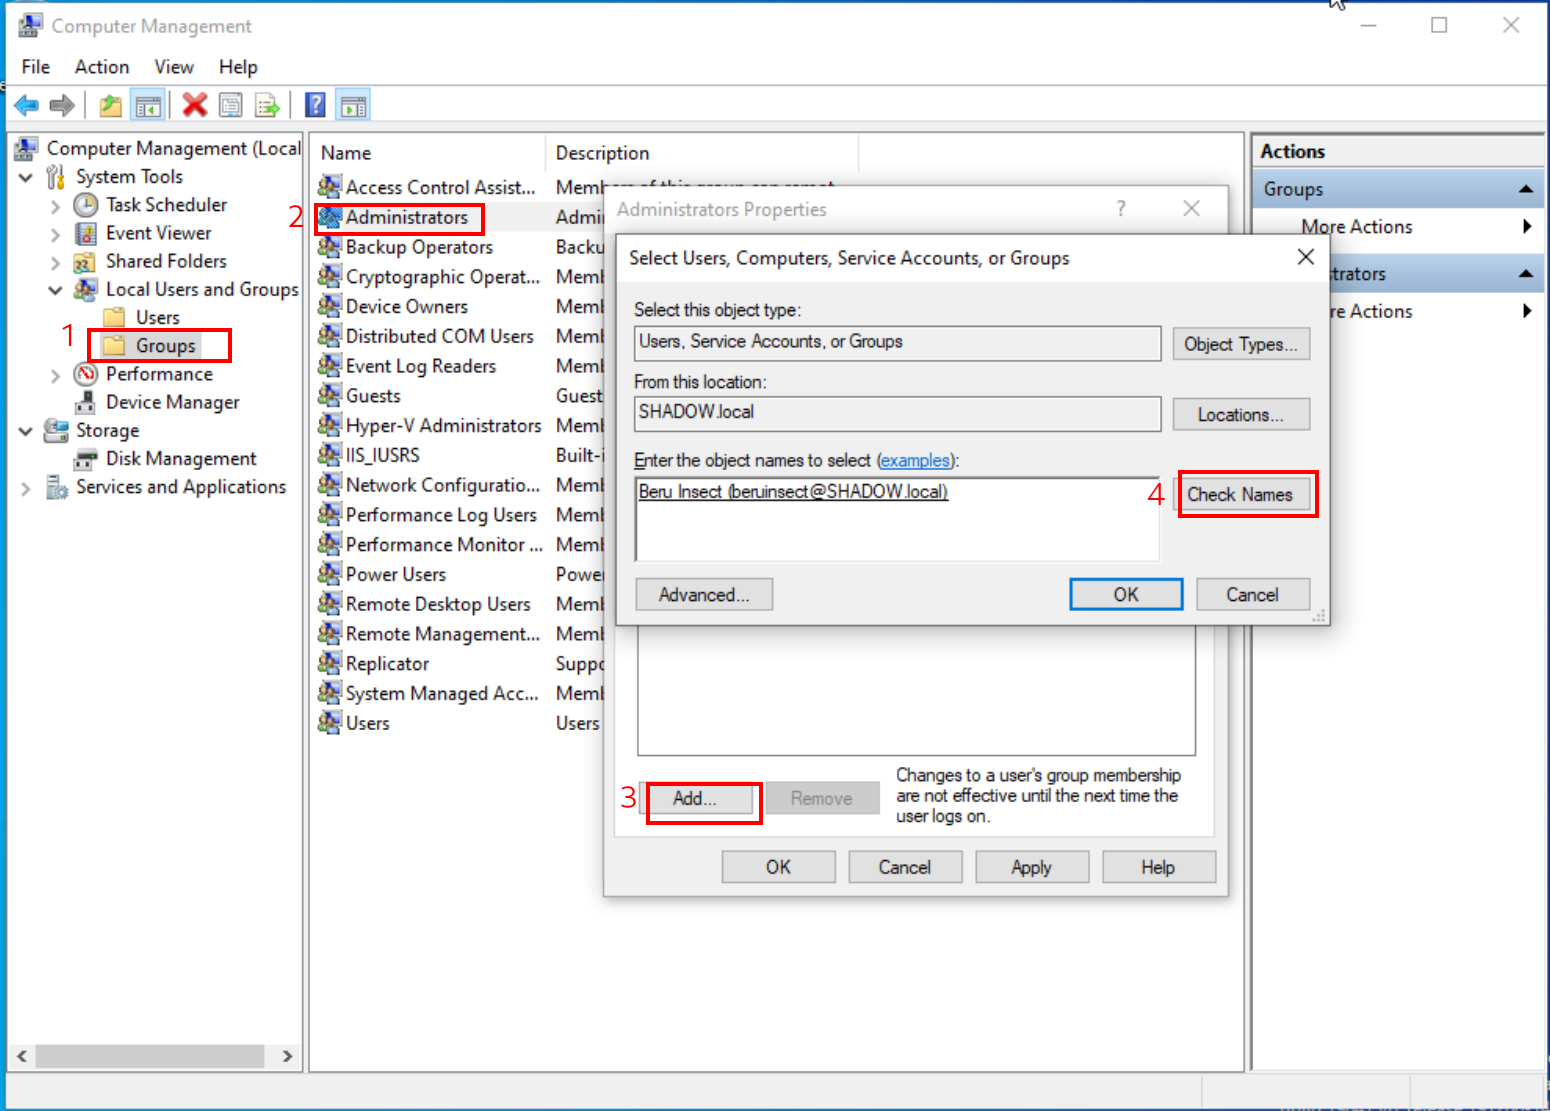
Process for adding a domain user as machine administrator
If all steps are correctly followed, you should see the domain user now listed as an administrator. It’s a significant milestone in setting up your domain for various attack simulations and learning experiences.
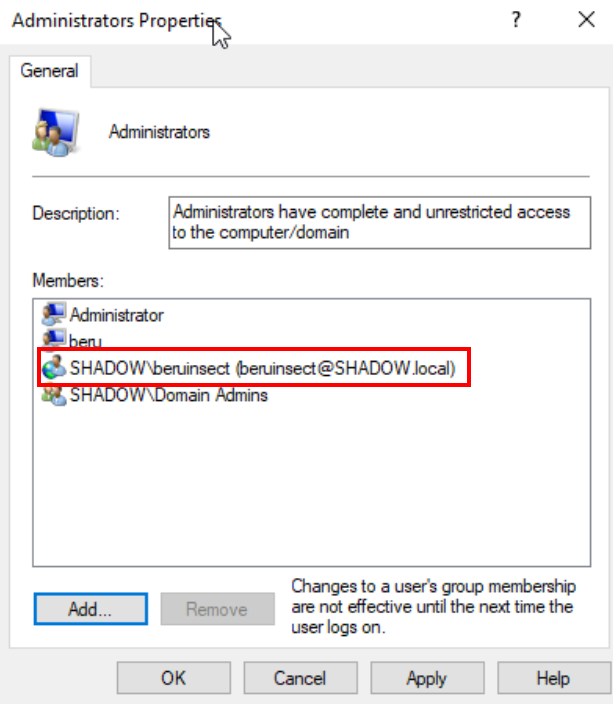
Verification that the user was added successfully
Activating SMB for Enhanced Network Functionality
Enabling SMB is a straightforward process, pivotal for practicing reconnaissance techniques and attacks such as NTLM relay. The journey begins in the file browser, where a click on the “Network” tab unveils the next steps.
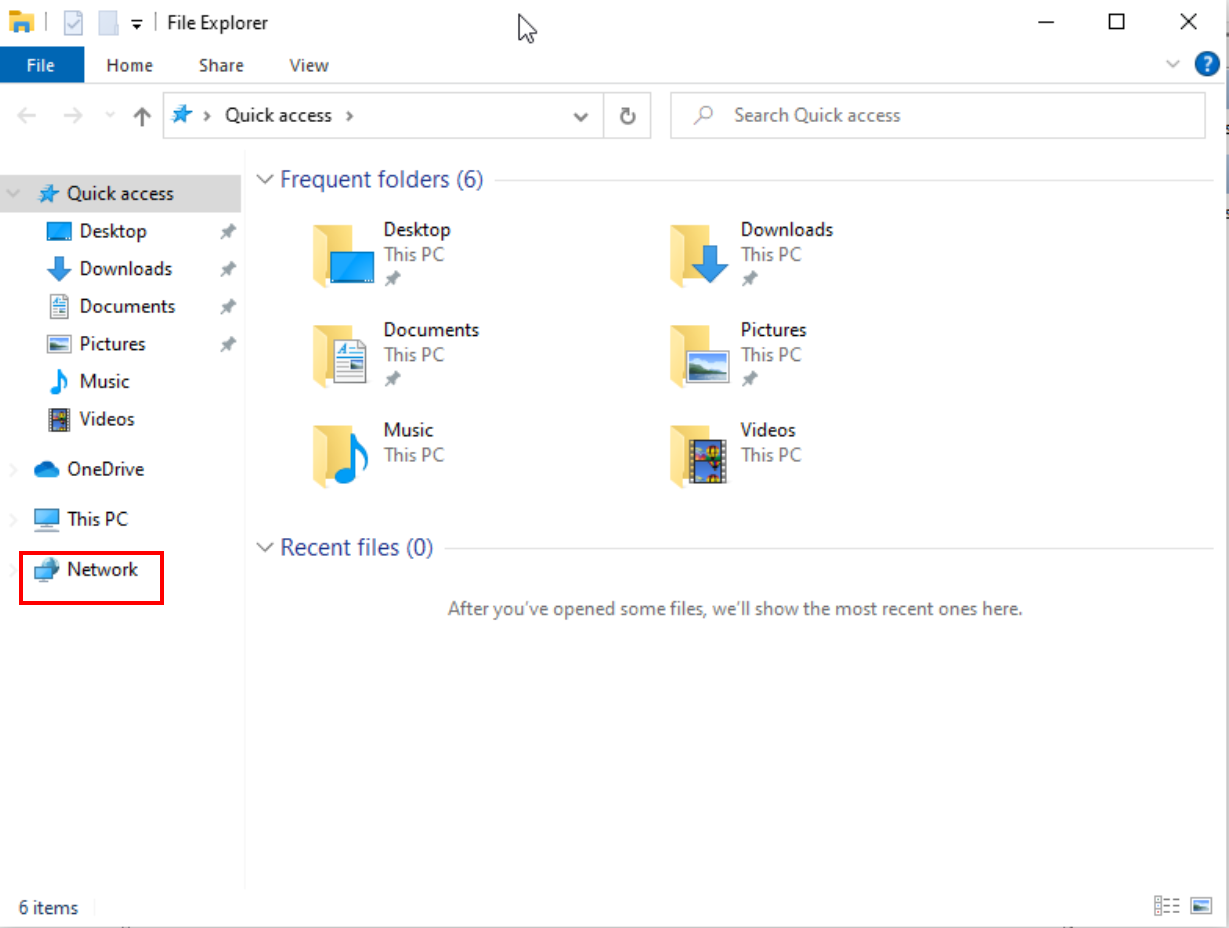
Network access from the file explorer
Initially, an error message greets us, indicating that SMB is not currently active. It’s a minor roadblock, quickly cleared by removing the error notice. What follows is a prompt displayed as a yellow bar, a signal to initiate network discovery and file sharing.
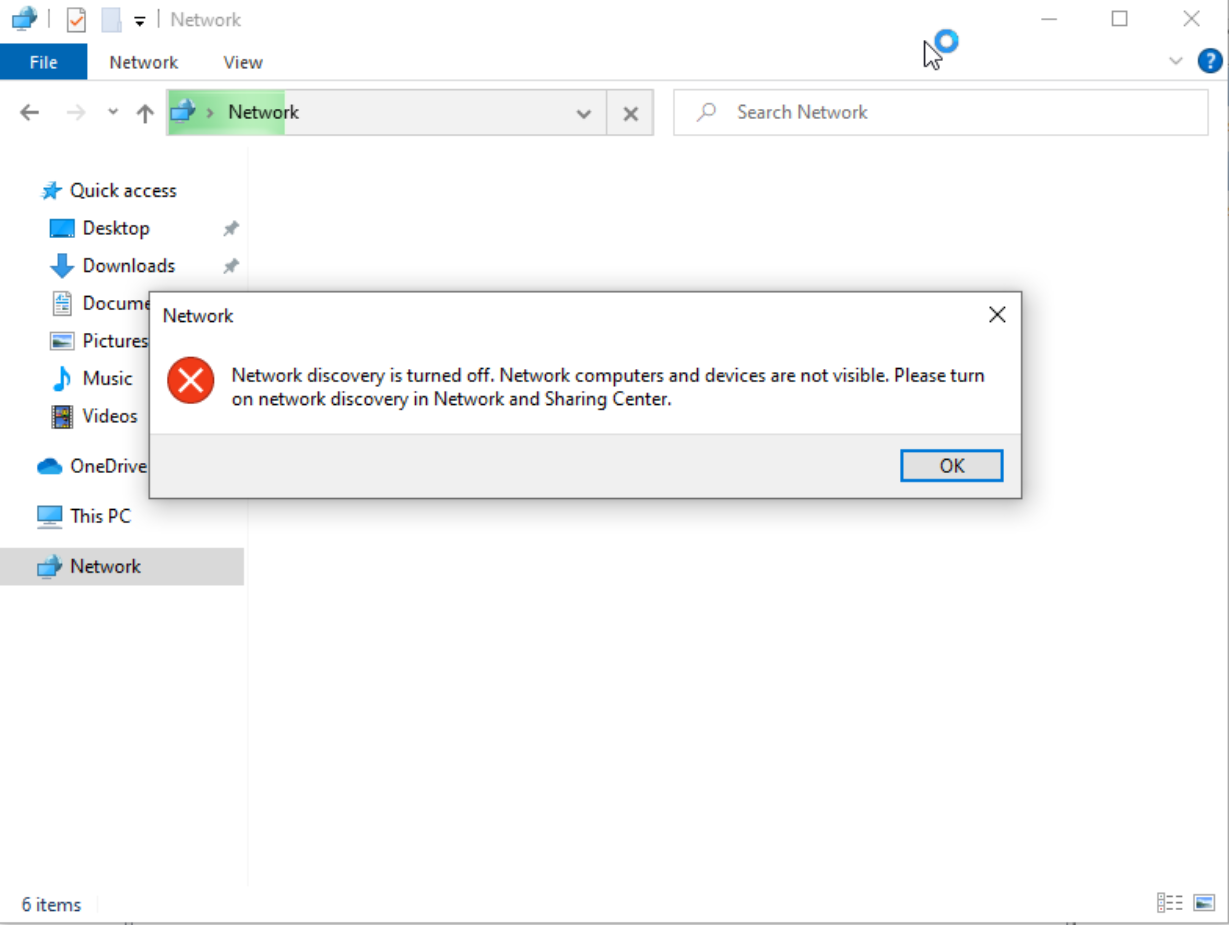
SMB disabled error
This prompt is our cue to action. By selecting “Turn on network discovery and file sharing”, we ignite the process of activating SMB. This step is more than a mere click; it’s the activation of a crucial service, laying the groundwork for a range of network-based exercises and explorations.
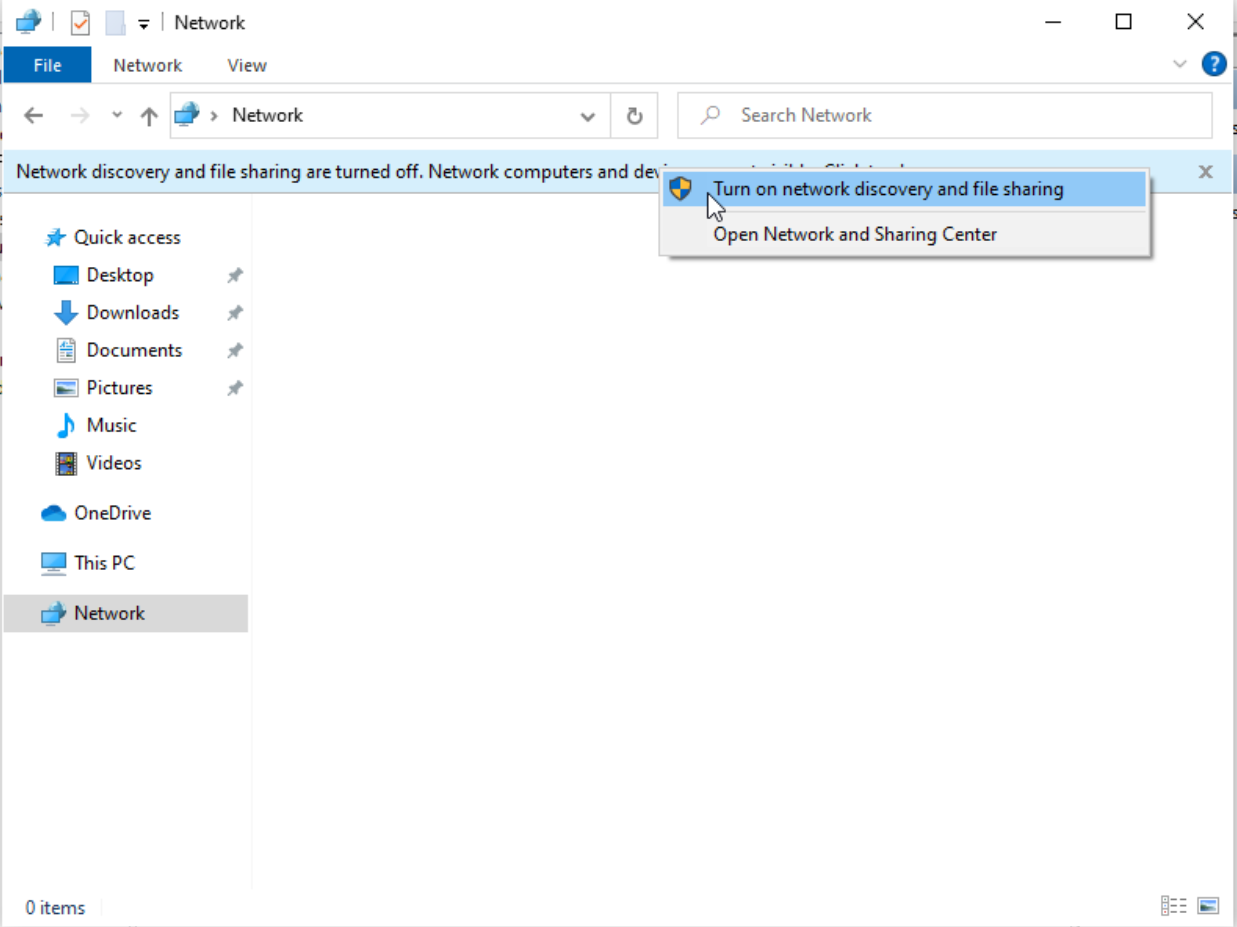
We start the SMB service on the machine
Wrapping Up: Building a Robust Active Directory Lab in Proxmox
In this chapter, we’ve journeyed through the meticulous process of configuring a functional Active Directory environment within Proxmox. Our path has led us from installing essential drivers for Windows machines to setting up a robust Active Directory domain, rich with opportunities for practicing diverse attacks.
We’ve navigated through various configurations, from aligning DNS settings for domain connectivity to integrating machines into our domain. Each step, crafted with precision, has contributed to a structured and organized domain landscape, ideal for delving into advanced attack strategies.
Key to our setup has been the creation and management of user accounts, including domain administrators and service accounts. These accounts, carefully crafted and managed, provide a realistic backdrop for simulating attacks like NTLM Relay, Password Spraying, Kerberoasting, and more.
Moreover, we’ve enabled SMB on our machines, a crucial step that opens doors to a plethora of reconnaissance techniques and network-based attacks. This activation not only enhances our lab’s functionality but also aligns it closely with real-world network environments.
In essence, this chapter serves as a cornerstone in building a comprehensive hacking lab, one that not only facilitates learning and experimentation but also mirrors the complexities and nuances of actual Active Directory environments. It’s a foundation upon which we can continue to build, explore, and refine our skills in the dynamic world of cybersecurity.
Tips of the article
What do I have to do in proxmox on windows machines if I want to be able to access the internet ?
I have to install the necessary drivers through the “Device Manager”.
Which package is essential for me to install in order to create an active directory domain?
Under “Add Roles and Features” in the “Server Manager” I have to install the package “Active Directory Domain Services”.
Which package do I have to install to be able to attack LDAPs?
I have to install the certificate authority in “Add Roles and Features” through the “Server Manager”.I have to install the certificate authority in “Add Roles and Features” through the “Server Manager”.
Could you tell me some attacks that I could practice focused on users ? And focused on service accounts (SPNs)?
It allows me to practice user enumeration, brute force or password spraying attacks. It also allows me to simulate attacks such as ntlm relay or network poisoning. On the other hand, by means of SPNs I could perform the Kerberoast attack.
What do I have to add in the network configuration of the windows machines to make them able to ping the domain ?
I have to put as dns of the machine to the domain controller.I have to put as dns of the machine to the domain controller.
What do I have to do to get crackmapexec to return a "Pwn" with the credentials of a specific user?
I have to make that user a local administrator of the machine (or domain). To promote it to administrator, I have to go to “Computer Management” and add the user to the administrators group.
References
Most of the active directory configuration has been based on the following fantastic video from CyberMentor :)
Chapters

Previous chapter
Next chapter

💬 Comments Available
Drop your thoughts in the comments below! Found a bug or have feedback? Let me know.